This documentation will offer you generic guidance on setting up Everest Backup Plugin.
Table of contents
Video TutorialContinue reading to install Everest Backup Plugin if you prefer written instructions.
How to change the Timezone of the WordPress website?
Install Everest Backup Plugin on your WordPress website
Before discussing how to install the Everest Backup plugin, first, we discuss setting the Timezone on the website. Setting up the timezone is one of the most important things to do while creating a WordPress website. With the help of Timezone, you will know which action takes place on which date. So we highly recommend you change the Timezone according to your location.
Video Tutorial
Continue reading to install Everest Backup Plugin if you prefer written instructions.
Before going into our main topic, let’s discuss changing the timezone of the WordPress website so we won’t be confused because of the server time during restoring the available file and others.
How to change the Timezone of the WordPress website?
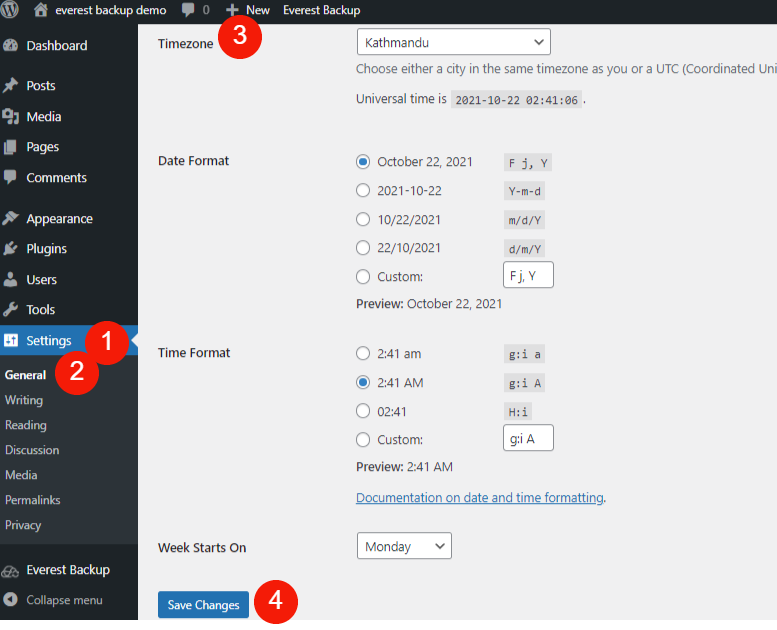
Step 1: Go to your WordPress website dashboard.
Step 2: You will see Settings on the left side of the Navigation Bar.
Step 3: Click on settings and select “General”. Here you can see
- Site Title
- Tagline
- WordPress Address (URL)
- Site Address (URL)
- Administration Email Address
- Membership
- New User Default Role
- Site Language
- Timezone
- Date Format
- Time Format
- Week Starts On
Step 4: Scroll down and you will see Timezone there. Click on the dropdown menu and type your timezone location.
For example, my location is in Kathmandu, so I type Kathmandu and select Kathmandu. Or you can scroll down to find your location. But better type your location for fast action.
After that as your wish, you can change the Date Format and Time Format.
Step 5: Save the setting.
Now all done,
Let’s go to our main topic
Install Everest Backup Plugin on your WordPress website
There are two methods to install the Everest Backup Plugin.
- Manual installation
- Add Plugin from Dashboard
Manual Installation
Download the Everest Backup Plugin from the download link below.
How to Install the downloaded plugin on the WordPress website?
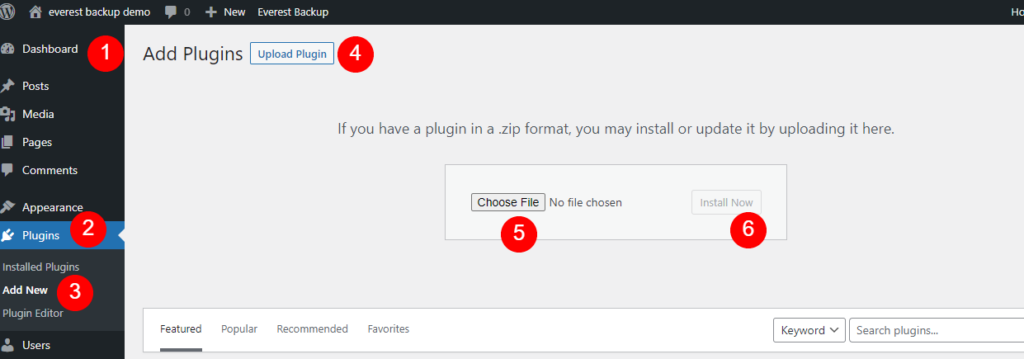
Step 1: Go to your WordPress Dashboard.
Step 2: On the left side, you will see Plugins and select Add New
Step 3: On the top, you will see the upload plugin
Step 4: Choose your zip file and install ( you can only upload a .zip format file here)
Step 5: Once the plugin is installed successfully, activate the plugin. (If you don’t activate the plugin, it won’t work.)
Now the plugin will be shown in your WordPress website dashboard.
Add Plugins from Dashboard
Step 1: Go to your WordPress website dashboard.
Step 2: On the left side, you will see Plugins.
Step 3: Select Add New.
Step 4: Search for Everest Backup.
Step 5: You will get it on the top left, then install the plugin.
Step 6: Once the plugin is installed successfully, activate the plugin.

After that, Everest Backup will be shown in your WordPress website dashboard.
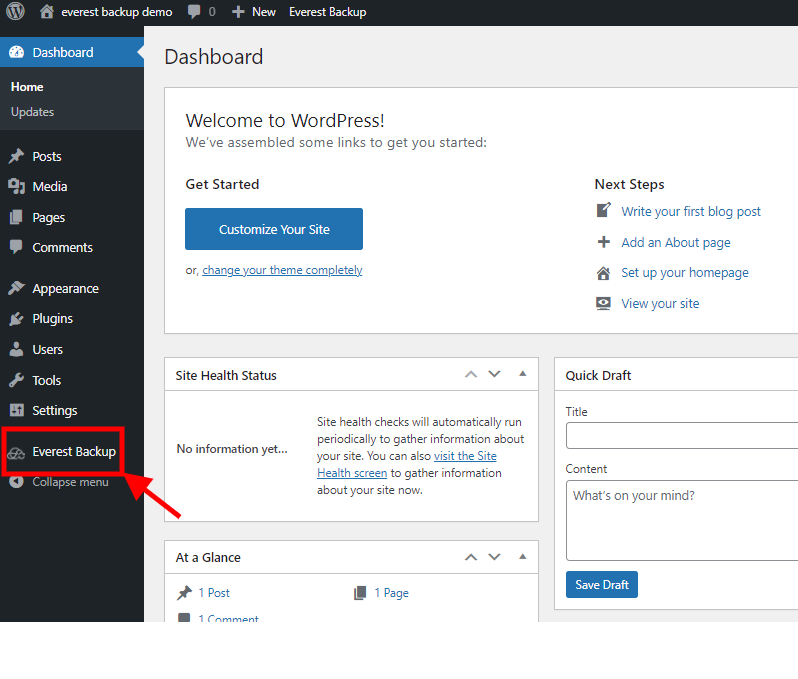
Now you can backup your file, plugins, data, and others, then restore the backup file or migrate/clone the file to another website with a single click.
We genuinely recommend you to follow the second method i.e., Add Plugins from Dashboard in your WordPress website. Instead of using “Local Web Server” to backup files use “Cloud Server” because if your local server crash then all your data will be destroyed.
That’s why we recommend you use cloud services to save your backup file.
Any errors??
While installing our Everest Backup Plugin on your WordPress website, if you get any kind of error message then send us an email at bug-report[at]wpeverestbackup. com with the screenshots of the error message, log file, and information about your system. To get information on your system go to Everest Backup Plugin setting, select general, and then information.