This documentation will guide you to backup manually using Everest Backup Plugin.
We assume that you have already changed the timezone of your WordPress website and then installed and activated our Everest Backup Plugin. If you haven’t installed and activated the plugin, go to Install Everest Backup Plugin.
Since you have installed Everest Backup Plugin, let’s talk about how we can take backup manually with Everest Backup Plugin. Here we have the visual tutorial and a step-by-step tutorial to backup manually using Everest Backup Plugin.
Video Tutorial
Continue reading to backup manually if you prefer written instructions.
- Open your WordPress website Dashboard.
Go to the Everest Backup plugin and select Backup. There you will see two options:
- Manual backup
- Scheduled backup.
Manual Backup.
Step 1: By default, we select the entire file which is shown in “What to backup?”.
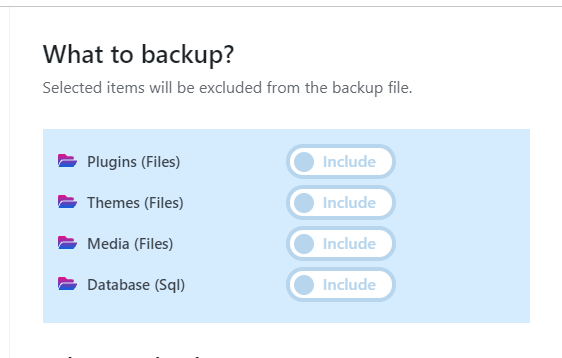
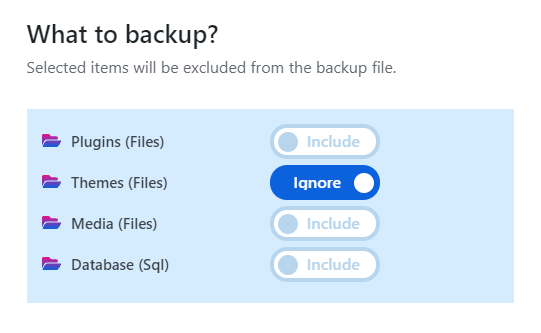
Step 2: You can ignore which file you don’t want to back up, for that, select what not to backup (plugins, themes, media, or database).
Step 3: Choose the server where to store the backup file. In the beginning, you will see “Local Web Server” to store your backup file. So click on the dropdown and you will get other server options like Google Drive. So you can select any of them to store the backed-up file.
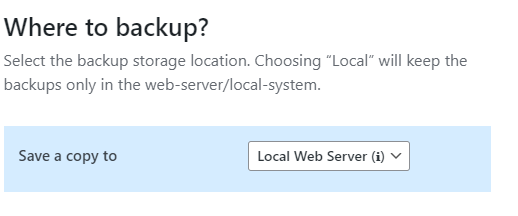
Local Web Server is default but we don’t recommend you to save your backup file in it. Because if your local server crash then all your data will be destroyed.
That’s why we recommend you use cloud services to save your backup file. There are many cloud servers you will find, among them “Google Drive” is our addon cloud server. So you can store your backup file in Google Drive, which you will find in our “Addon” tab.
The main benefit of storing backed-up files in a cloud server is you can get the backed-up file from anywhere if you are connected to the internet.
To know more about installing Google Drive in your Everest Backup Plugin, go to “Everest Backup Google Drive“.
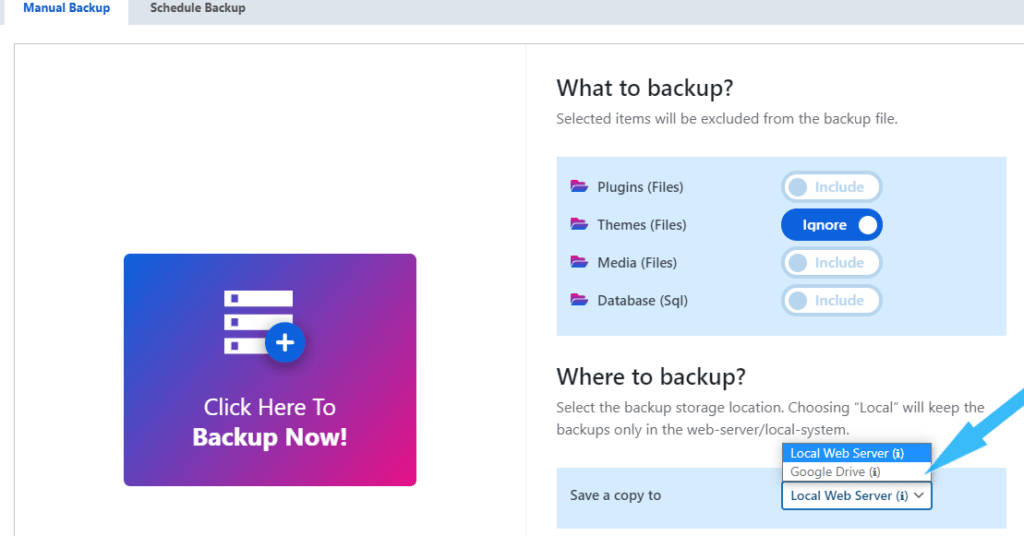
Step 4: Click on backup now.
Step 5: Click on download.
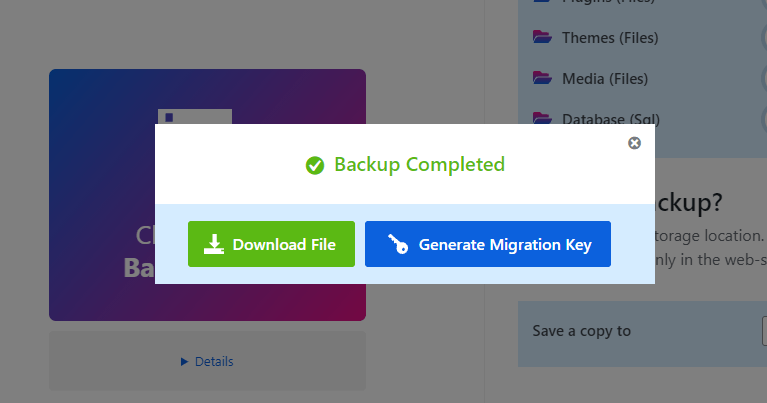
It takes a few seconds to download and the time taken will depend on your file size and the Internet Speed. After completion, a popup dialogue box will appear from where you can Download the File and Generate a Migration Key to migrate the file from one website to another or one server to another.
You can click on “Details” to get information about at what time your backup started, disk size, when the backup was completed, how much time it took to backup, the size of your backup file, and the status of whether your file is backup or not. With the help of this Human Readable Log, you will know what is happening back on your website.
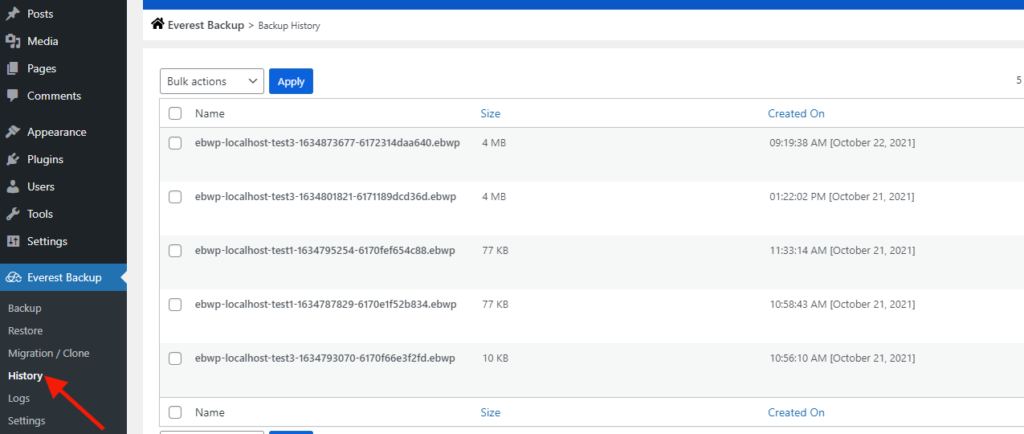
Or you can go to the History option of Everest Backup Plugin where you will see the list of files with their size and date of creation.
Since, your files are backed up successfully, no need to worry about data fraud or anything. Because you can easily restore the backed-up file. To know more about Restore visit How to restore your data?
Need any help?
When you backup manually and get any kind of error message then send us an email at bug-report [at] wpeverestbackup.com with the screenshots of the error message, log file, and information about your system. To get information on your system go to Everest Backup Plugin setting, select general, and then information.
