This documentation will guide you to restore the available file.
We assume that you have already changed the Timezone of your WordPress website and then installed and activated our Everest Backup Plugin. If you haven’t installed and activated the plugin then go to Install Everest Backup Plugin.
Video Tutorial
Continue reading to restore available files if you prefer written instructions.
Step 1: Open your WordPress website Dashboard.
Step 2: Go to Everest Backup Menu then click on Restore. There you will get two options:
- Upload File
- Available Files
Step 3: Click on Available Files
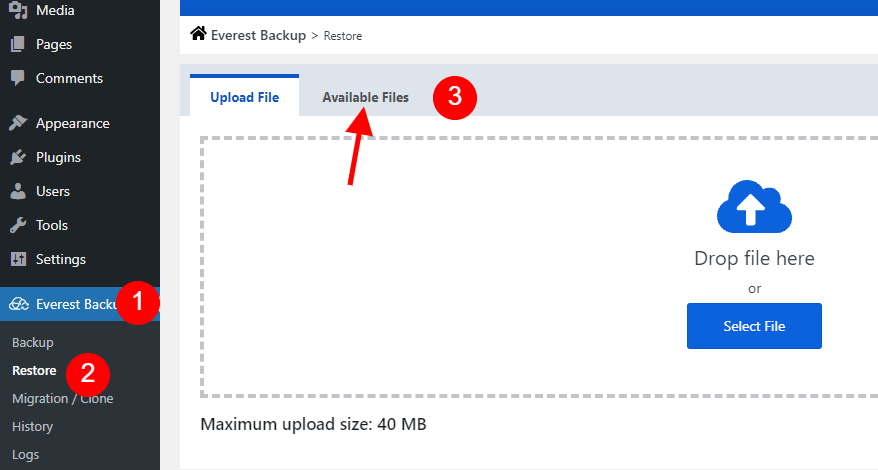
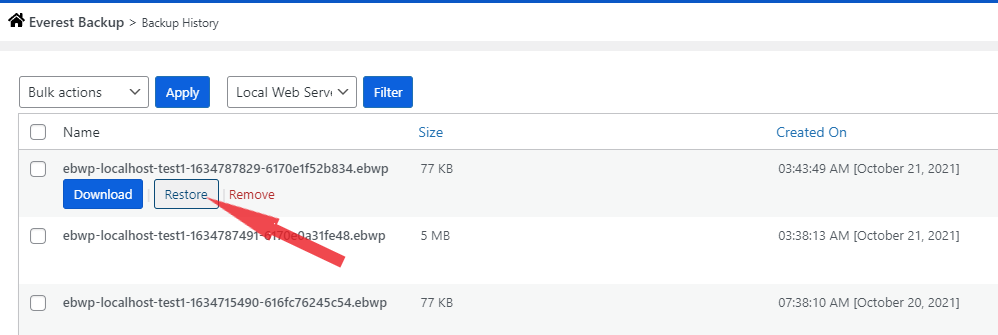
Step 4: Check if the file, which you want to restore is available or not.
You can select the file from the cloud server also if any of the addons are installed and activated in the Everest Backup Plugin. If you haven’t then go to install addons in Everest Backup Plugin.
Step 5: If yes, click on restore.
Step 6. Click on Rollback.
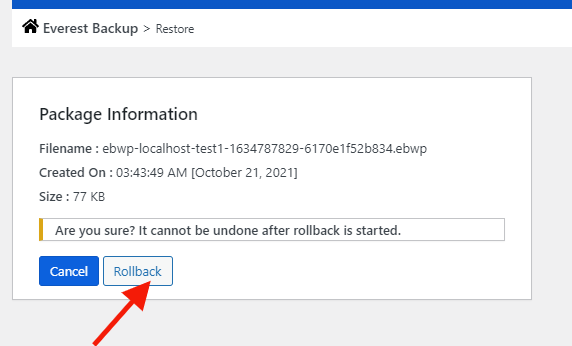
After some time, it will be restored. The time taken to restore will depend on the file size and your internet speed.
After completion of the restore, you will go to the Login page.
Let’s say the username and password of our website be
Username: Test1
Password: Test1_Test1
And the file username and password, which we restore recently be
Username: Test2
Password: Test2_Test2
Step 7: Log in with the username and password of the file which is restored.
To log in to the dashboard using
Username: Test2
Password: Test2_Test2
Then you will be directed to the Everest Backup Plugin Log section, where you will see the file with its type i.e., Rollback. It means the available file in Log is a restored file. You can click on the dropdown to see the Human Readable Log and get back information about your system.
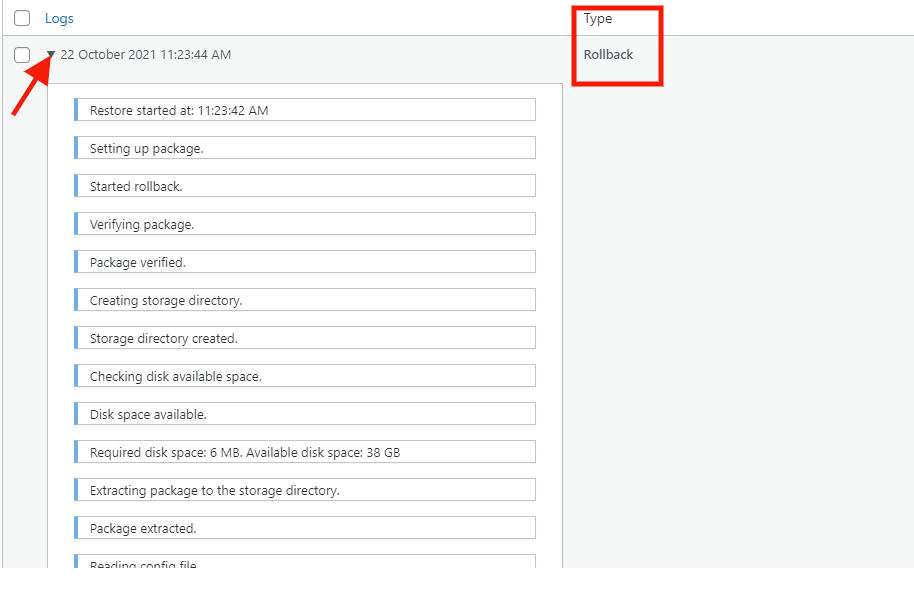
When you restore the backup file, it overwrites and erases any material and settings made beyond a certain point, potentially failing content and settings. So check the backup file before restoring the file to the website. It will take some time to completely restore the data on your site ranging in your file size.
If you’re worried about losing material when restoring a backup on your site, you can export it first and back it up.
Other methods: to restore available files from History
Step 1: Go to Everest Backup Menu, where you will see History.
Step 2: Click on history, there you will get the list of files with their size and date of creation.
Step 3: Choose and click on one file.

In the filter tab of Backup History, you will see the list of servers like “Local Web Server”, and “Google Drive“. If you have backed up files there using Everest Backup Plugin then, you can directly Download, Restore, and Remove the files without login into the cloud server.

Step 4: Click on Restore and Rollback within a few it will restore.

After completion of the restore, you will go to the Login page.
Let’s say the username and password of our website be
Username: Test1
Password: Test1_Test1
And the file username and password, which we restore recently be
Username: Test2
Password: Test2_Test2
Step 5: Log in with the username and password of the file which is restored.
To log in to the dashboard using
Username: Test2
Password: Test2_Test2
Then you will be directed to the Everest Backup Plugin Log section, where you can see the Human Readable Log of the file by clicking on the dropdown.
Any errors??
If you get any kind of error message when you restore the available file, then send us an email at bug-report[at]wpeverestbackup. com with the screenshots of the error message, log file, and information about your system. To get information on your system go to Everest Backup Plugin setting, select general, and then information.
