Are you seeking the best WordPress migration plugin to move your website to a new web server in a secure manner?
I’ve got you covered whether you’re looking for a personal migration plugin or one to use on client sites. Before digging into our main topic (the best WordPress migration plugin) let’s get used to the word WordPress migration and its features.
Table of contents
WordPress MigrationFeature of Good Migration Plugin
Why a WordPress migration plugin is needed?
How to migrate your website
Some of the best WordPress Migration Plugins
- Everest Backup Plugin
- Migrate Guru
- Duplicator Pro
- WP Staging
- WPvivid backup plugin
- Updraftplus premium
- Total UpKeep
- All-in-one wp migration
- Wpbackitup
- Backup Guard
- Backupbuddy
- Wp migrate DB
- Blogvault
- WP Clone by WP Academy
- Jetpack
Final thoughts
WordPress Migration
The process of moving a WordPress installation including its parts from one server to another without affecting its functionality is called migration. Typically WordPress migration involves moving files and the database of a website.
Files:
The WordPress website files contain themes (look and feel of the website), plugins (functionality of the website), media files (images, audio, videos, and downloadable files), and code files (javascript, PHP, and other code of the website )
Database:
WordPress depends on the database to store everything from posts and pages to user accounts and custom code. The database is like an organized filing cabinet for all data. It can be used by software to manage and program the way it is stored within a website, including posts, pages, or content on any given topic as well as comments from other visitors who have read those pieces of writing.
A complete website migration involves the migration of both files and databases without losing any data.

When do you need migration of your website?
- When your website needs to go to the live server from the Localhost WordPress website then you need to migrate your website from localhost to the live server.
- Changing your current hosting service provider to a different host
- Moving a website from a subdomain to a different directory

- Shifting the website content from one domain to another
What is the Feature of the best WordPress Migration Plugin
Before jumping into the best WordPress migration plugin, we first need to know the feature of the migration plugin. Need to know what kind of features should a good migration plugin must have to be the best WordPress migration. plugin. I have listed some of the most features of the migration plugin here:
- Simplicity
According to the size of your website, it takes time to migrate from one server to another or one host to another and if we choose the complicated method then there is less chance of 100% success and a high chance of losing data or damaging the website. So to make everything simple and easy, which we all want, it is important to use a plugin with an easy-to-use feature.
- Comprehensive
The migration plugin must be capable of handling complicated scripts while also ensuring that no detail is overlooked. This includes copying all of your website’s files, photographs, videos, and other assets as well as effortlessly transferring all of its data to a new database.
- Backups
Before migrating any website, you must take a backup of your website which means the migration plugin needs to have a backup feature in it. So that you can backup your website before migration because sometimes you might lose data so if you have a backup then it won’t be any problems.
If the migration plugins have a manual backup feature then it is good but if it has an automatic backup feature too then it will be awesome. If you forget to backup before migration then also no problem because the system automatically backs up your website as per the instruction given.
- Cloud Storage
It’s okay if the migration plugins have local storage but if you talk about the best WordPress migration plugin then that plugin must have a cloud storage feature in it. Local storage is limited (depends on the storage device) and you can’t access the data when needed. But with cloud storage like Google Drive, Dropbox, S3, Amazon, Azure, and others, you can get unlimited storage and can access it from any corner of the world if you are connected to the Internet.
In addition, it is so time-consuming and tedious task to download all the files and upload them to a new host but with cloud storage, you can back up to any cloud storage and simply import it to a new host. In a few simple clicks, your website will be migrated to a new host and it won’t be time-consuming or tedious work.
- Cost-effectiveness
Here comes the most important factor for anything i.e. price of the plugin. The first thing to notice about anything is its price because we don’t want to waste money on anything with fewer features. And it won’t be much problem for big businesses to pay for the plugin but it is a huge decision for small businesses. So the price of the plugin must not be expensive so that small businesses also get the plugin for their website.
It is not easy to provide plugins at the cheapest price but you can provide a featured-packed option price. Like free version with some features, and for additional features pay according to the requirement. Like this small businesses will get plugin features according to their budget and big ones get the package plugin.

How to migrate your WordPress website?
You can migrate your website in many ways but here we will discuss mainly three methods, manual migration, migrations provided by your web host, and using the WordPress migration plugin.
Manual Migration:
Migration of a website is a difficult and confusing task and needs to do it carefully, a small mistake can cause a huge disaster. So before starting this migration process you need to take a backup of the whole website including the database, themes, plugins, and all other files.
After completion of the backup, you need to upload them to a new server using the FTP tool. And it will take some time according to your website size and manual migration of your website is done.
Don’t you think it takes quite a bit of time and effort? When a small website takes time and effort then just imagine how much time and effort it will take if the website is huge with lots of data which confuses us. What if anything goes wrong then with these data, it might not always be possible to track any issues that happen.
If the issue comes while taking backup then that will affect the entire migration process. And need to manage downtime so your users don’t see a broken website. So that we don’t recommend you this method to migrate the website.
Migrations provided by your web host:
Many web hosting companies provide free migration services for moving to their server. They usually have professionals on staff who are well versed in the migration processes.
Check out the best cloud hosting for Nepal
Certain web hosts also provide periodic, backups so that you don’t have to worry about the hassle of backing up every single life. But there are some limitations also. You might lose data, website hack, can’t upload designs, and many more. So this method is better than manual migration but this method can be risky and you need to visit your web host provider every time you need to migrate your website.
Using WordPress Migration Plugins:
If you are “OK” with data loss or someone else doing this job then feel free to use the above two methods. But if you want to migrate your website by yourself with some easy and simple steps then install the best WordPress migration plugin on your WordPress website.

I have listed the best WordPress migration plugin below and before that, you must wonder why we need a plugin then here is the answer.
Why a WordPress migration plugin is needed?
Yes, there is an option of doing all work manually but isn’t it a time-consuming task and risk to do. And nobody will recommend doing it manually unless you know how to do it and what to do. For the migration process, you need to follow many technical steps and it might take a long time if you have a huge website.
And it’s not the best excuse for not using the migration plugin if you know all the steps to do, what to do, and have plenty of time to do it. Who doesn’t want the simple and fast work, after all, nobody wants to risk crashing the website and losing all the hard work because of one tiny mistake.
So for a fast and simple process, accurate work, and no chance of data loss, you must need a WordPress migration plugin. Little help and guidance to use the WordPress migration plugin are enough and you can do it yourself without help from a professional.
Some of the best WordPress Migration Plugin (Tried and Tested):
| S.N | Plugin Name | WordPress Rating | WordPress Version | PHP Version | Tested up to | Cost |
|---|---|---|---|---|---|---|
| 1 | Everest Backup | 5 | 5.6 or higher | 7.3 or higher | 5.8.3 | Free |
| 2 | Migrate guru | 4.9 | 4.0 or higher | 5.4.0 or higher | 5.8.3 | Free |
| 3 | Duplicator pro | 4.9 | 4.0 or higher | 5.3.8 or higher | 5.8.3 | $69 for 1st year and $42 from 2nd |
| 4 | WP Staging | 4.9 | 3.6 or higher | 5.6 or higher | 5.8.3 | $89 per year |
| 5 | WPvivid backup plugin | 4.9 | 4.5 or higher | 5.3 or higher | 5.8.3 | $49 for a two-site |
| 6 | Updraftplus premium | 4.8 | 3.2 or higher | all | 5.9 | $49 for the 1st year and $29.40 per year for the 2nd year |
| 7 | Total UpKeep | 4.7 | 4.4 or higher | 5.4 or higher | 5.8.3 | $30 per year |
| 8 | All-in-one wp migration | 4.6 | 3.3 or higher | 5.2.17 or higher | 5.8.3 | $69 one time price |
| 9 | Wpbackitup | 4.6 | 3.8.0 or higher | 5.2.4 or higher | 5.8.3 | $79 for a single site per year |
| 10 | Backup Guard | 4.5 | 3.9 or higher | 5.3.3 or higher | 5.8.3 | $25 per year |
| 11 | Backup buddy | 4.5 | 3.9 or higher | 5.3.2 or higher | 5.7.5 | $80 for a single site |
| 12 | Wp Migrate DB | 4.5 | 5.2 or higher | 5.6 or higher | 5.8.3 | $49 for a single site |
| 13 | Blogvault | 4.2 | 4.0 or higher | 5.4.0 or higher | 5.8.3 | $89 per year |
| 14 | WP Clone by WP Academy | 4.1 | 3.3 or higher | 5.5 or higher | 5.8.3 | Free |
| 15 | Jetpack | 3.9 | 5.8 or higher | 5.6 or higher | 5.9 | $39 per year |
Things to do before migrating your WordPress website:
- Install the Best WordPress migration plugin on your website.
- Take a backup of your website (all data, files, plugins, and others) so that if anything goes wrong during the migration process then you won’t lose anything.
- Prepare for your migration destination whether it is another website or host or server.
Everest Backup
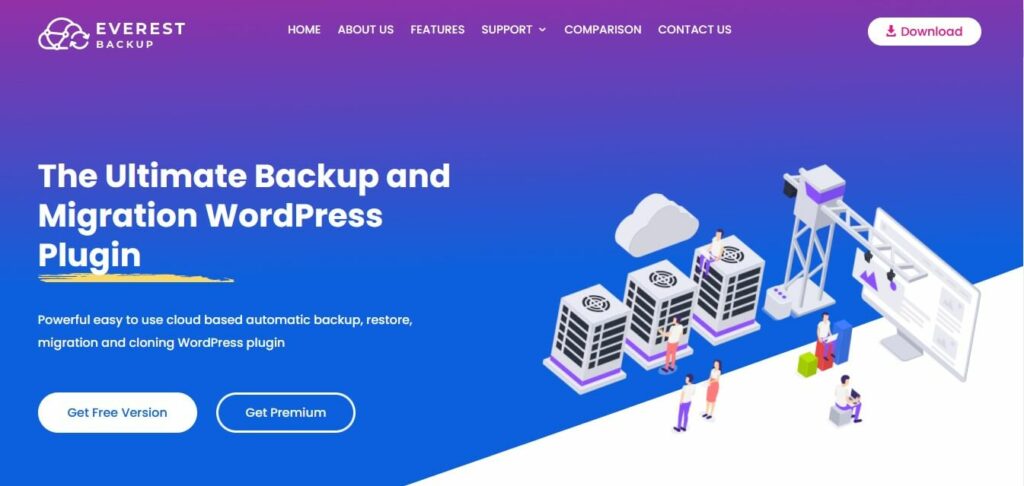
Overview:
Everest Backup is a cutting-edge utility for backing up, restoring, migrating, and cloning your website.
It is the quickest and most user-friendly cloud-based storage backup plugin available. Connect your Google Drive in a few clicks and schedule your backup. Everest Backup offers both manual and automatic scheduled backups, which it pushes to your Google Drive. Everest Backup is capable of more than just backup and restoration.
It’s also the most effective and the best WordPress migration plugin. Copy and paste are all it takes to migrate a website. Create and copy your migration key from the source website, then paste it onto the destination page. Your site migration is completed with a single click. One of the distinguishing aspects is that the logs are human accessible, so you don’t need any technical skills to figure out what’s going on during your website backup. You’ll receive an email with details about each backup.
Although it is a new plugin with 100+ downloads, it is the best WordPress migration plugin. It has all the features the best WordPress migration plugin should have. And the main thing you get is it for free in the free version, you can backup (manual and automatic), restore(available file and upload files), and migrate/clone. For other features only you need to pay so it might be the best option for you. In addition, the UI/UX is so simply designed and the steps are not confusing. You can just read the documentation or watch the tutorial video and can backup or restore or migration without any help from experts.
Features:
- Manual and Automatic Backup
- Backup on Google Drive
- Easy steps to migrate and clone
- Advanced reporting
- Human Readable Logs
- Multisite Compatible
How to migrate your WordPress website?
First, install Everest Backup Plugin on your WordPress website. This article will help you to install Everest Backup Plugin on your website: How to install the Everest Backup plugin?
After installation better you take a backup of your website. In Everest Backup you will get two options to backup manual and automatic, so you can choose any one of those.
Confused? How to take backups then
For automatically backup: How to Schedule Backup?
For manual backup: How to Backup manually?
Now let’s start to migrate our WordPress website.
Login into the dashboard of the website to which you want to migrate and select Migration/Clone. Then select the backup files and generate the migration key. Copy that migration key and paste that migration key where you want to clone, verify the key and click on the clone.
If you want to clone on another website then paste that migration key into the clone tab verify the key and click on the clone.
According to the size of the website and your internet speed, it will take some time and once it is completed you will be directed to the login dashboard. Log in to the website dashboard with the login details of the website to which we migrate.
For brief description: How to migrate/Clone your website?

Migrate guru
Overview:
Migrate Guru was debuted in August 2017 with over 60,000 active installations till today. It was designed by the BlogVault team but works on all hosts and promises to be the quickest WordPress migration plugin available, executing migrations up to 80% faster than competing plugins. The plugin can be used with any WordPress site up to 200GB in size.
Migrate Guru is also designed to be simple to use, so once you’ve entered the information, all you have to do is click the migrate button instead of going through the time-consuming export and import processes.
Features:
- One-click migration
- No overload on site
- Built for large sites
- No addons, no storage space required
- Compatible with every web host
How to migrate your WordPress website?
At first, you need
- cPanel details
- Domain with the new host with WordPress installed
- Destination server’s IP address
Step 1: Install Migrate Guru Plugin on your WordPress website
Go to Plugin> Add New> Search Migrate Guru> click to install and activate it
Step 2: Complete the Migrate Guru migration form
Select the web host you are transferring your web host too. Fill out the form by entering the email address, Destination site URL, and Destination Server IP address.
If you do not know these details, you can find them out easily:
- Log in to your web host account and go to the menu bar displayed at the top of the
page. - Click on Hosting and choose cPanel.
- The destination server IP address is on the left-hand side.
bar of the cPanel page. - For the cPanel username, access the mail your web host would have sent you when you first signed up for an account. The cPanel password is usually set when signing up for a web host service. It is the same password you use to login into your regular web host account.
- If you want to use FTP, follow the same steps as above.
Step3: Click on Migrate
After completing the form click on the Migration button. Migration Guru will send you an email notification confirming that the process of migration has begun.
Once the migration process is completed, you’ll receive another email from Migrate Guru notifying you about the successful migration.
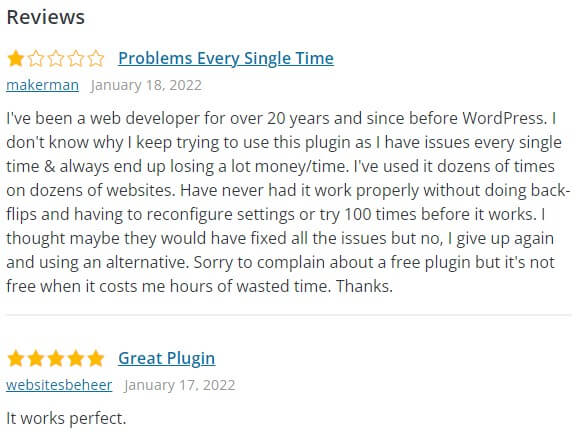
Duplicator pro
Overview:
Duplicator Pro is the best WordPress migration plugin available. It works well in a variety of migration circumstances and requires no technical skills. Over 900,000 people have downloaded and installed Duplicator.
However, some technical knowledge is required to set it up and get it to work effectively. You might get along better with a different plugin. It features a clear step-by-step wizard that takes you through the migration process.
Before building the archive of the site, Duplicator requires you to manually enter details about your host and database, as well as run several checks. If your site has a large database or a lot of files, you might have to fiddle around a bit to get it to backup properly.
Features:
- Manual backup.
- Optimized for speed.
- Easy to use and set up.
- Allows you to create a staging website.
- Clone, restore, and migrate your site.
How to migrate your WordPress website?
First, install Duplicator Pro into your WordPress website to migrate your website.
Select Duplicator> Packages, then select Create New in the top right corner. Name your packages, then click Next. Duplicator will scan your site for potential issues. If your site has issues then it will highlight the problem so that you can resolve those. After resolving the problem rescan, click on the Build button. It will create your package for migration which will take some time depending upon the size of your website. Now select One-Click Download and it will download the installer.php file.
Now create a database on your new server, add a new user, add a user to a database then click Add. Check the ALL PRIVILEGES box on the Manage User Privileges and click Make changes. Now upload your Duplicator package. After completion check the new website work or not.
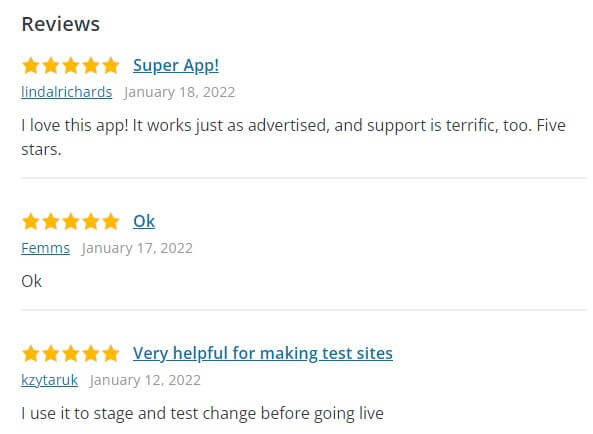
WP Staging
Overview:
This duplicator, staging, and backup plugin can duplicate your complete website in a matter of seconds. No data is shared with the plugin because the sites are hosted on your server. A staging website can be used to test updates, changes, or backups.
You can clone your website for free using the free version. That is, you can construct a staging website for free using your live website. However, pro packages are required to migrate your staging website to your live website or to clone to an external database, subdomain, custom subdomain, or custom destination directory. It has over 60,000 active installations.
Features:
- Easy to use
- Clone the whole production site into a folder
- No Software as a Service
- No server timeouts on a huge website
- Very fast migration and cloning or backing up process
How to migrate your WordPress website?
At first, backup the entire production and staging site with a backup tool of your choice. Then copy the files from your staging site subfolder to the production site using the FTP program. Now use WP STAGING PRO and clone the entire staging site automatically to live by clicking one button only. After that convert staging DB tables to live database.
If you get WP STAGING PRO then it will work automatically so that you don’t have to worry otherwise you need to do some parts manually.
WPvivid backup plugin
Overview:
The WPvivid Backup Plugin is a free and paid version of an all-in-one backup, restore, and best WordPress migration plugin with over 100,000 active installations. Migrations restore, and backups are all handled by the free version. So you can clone your WordPress site to a different host or domain, schedule regular backups, and save them on a variety of popular remote storage services.
Furthermore, the Pro edition adds control granularity by allowing you to manage individual component rollbacks such as plugins and themes, build a developer environment, backup/migrate using remote storage, and back up several sites at once.
WPvivid’s plugin is also General Data Protection Regulation compliant, so if you’re a site administrator in Europe or work with European websites or customers frequently. This WordPress migration plugin is great. WPvivid enables cloud storage backups and migration from all major cloud services, just like many of the other plugins.
Features:
- Incremental backups.
- Advanced remote storage.
- Multi-site backup.
- Easily schedule your backups.
- Auto backup WordPress core, themes, and plugins.
How to migrate your WordPress website?
Install the WPvivid Backup Plugin on both WordPress websites to migrate from the current host to a new one. Then login into the dashboard head on over to the WPvivid key tab and generate a key.
Now go to the WordPress website where you want to migrate select the Auto-Migration section and paste the migration key. Then click save then choose what you want to transfer (select both database and files for the whole website migration). Now click on clone then transfer and the migration process will start.
Depending upon your website size and internet speed it will take some time. Once the transfer is completed, go to WPvivid>Backup and Restore menu of the destination website. Scroll and you will see the new backup file, now you can download, restore, or delete the backup file. To begin the migration process click on restore. You can select restore and replace the original domain or restore and keep the original domain unchanged.
Updraftplus premium

Overview:
UpdraftPlus is a plugin for backing up and restoring WordPress sites. Websites may be restored and backed up to the cloud with ease. You’ll need to upgrade to the premium version of the plugin or buy the UpdraftPlus Migrator plugin separately to access the migrate and clone features. Since in the free version, you will get back up and restore features only.
There are over three million active installations of this plugin. The plugin is available in both a free and a premium edition. Cloud backup to several other services is available in the premium edition (Microsoft OneDrive, Microsoft Azure, Google Cloud Storage, SFTP, SCP, and WebDAV).
Features:
- Dedicated expert support.
- Advanced reporting.
- Database encryption.
- Supports multi-site/multi-network.
- More storage and multiple destinations.
How to migrate your WordPress website?
As usual, install UpdraftPlus Premium on your WordPress website. Then go to Settings> UpdraftPlus Backups>Migrate/Clone. Click on the ‘Receive a backup from a remote site’ button in the Migrate section. It will open settings and click on create key button. It will generate the migration key and copy that key.
Now login to your other website where you want to migrate and go to settings>UpdraftPlus Backups>Migrate/Clone. Then click on Send a backup to another site and click on Add a site link. Paste the copied migration key there and press Add the site. Now you will see the destination site URL which means you are ready to migrate so click on the send button. Then select the files which you want to clone(select all files except WordPress core) and click on the send button.
The migration process will begin and it will take some time according to your website size and your internet speed. Once it is completed you will see a new backup in Existing Backups then click on restore and then select all options. Then check on database restoration options and click on Restore.
Wait for some time and the migration process will finish then directed you to the login section of the website. Login to the website and you will see the website is successfully migrated.
Total UpKeep

Overview:
You may rest easy knowing that your site is always backed up with the Total Upkeep plugin. This plugin makes taking scheduled backups simple. It also offers cloud backup solutions like Amazon S3, Google Drive, and FTP / SFTP.
It allows you to migrate your website effortlessly across servers and domains, in addition to providing a solid backup. Simply install Total Upkeep on both websites, generate a backup archive on the first site, and then restore that backup on the second. It has over 80,000 active installations.
Features:
- Amazing customer support.
- Effortlessly create staging sites to test new plugins and themes.
- Clone, duplicate or migrate your site in just a click.
- Remote backup via FTP/SFTP, Amazon S3, and more
- Site Check monitors your site at specified intervals for errors.
How to migrate your WordPress website?
Install the Total Upkeep plugin on both of your currents and destinated WordPress websites and take backup of your current website.
Then on your current website, go to Total Upkeep>Backup Archives>View Details and click on Get Download Link. Copy the link.
Now go to the destinated WordPress Website dashboard, where you will see Total Upkeep, and go to Transfers>Destination. Paste the copied link into Download URL Address and click Upload. It will take some time to upload depending upon the website size and once it is completed click on Restore. Once it’s done check whether your website is functioning properly or not. If all is good, then update DNS to your new host.
All-in-one wp migration
Overview:
The All-in-One WP Migration plugin was created to make it simple to export your WordPress database, media files, plugins, and themes. After you’ve migrated your site, you can use the find/replace database tool to easily repair broken files and links.
The plugin is designed to bypass webserver upload size restrictions up to 512MB for the free version and 5GB in the pro version. There’s also a built-in feature that allows you to transfer WordPress to cloud services, such as Google Drive, Dropbox, Amazone, One Drive, and many others.
Another feature that sets this plugin apart from the competition is that it is mobile-oriented, making it simple to backup and migrate WordPress when you’re away from home or the office. Over 300,000 sites are presently using the plugin.
Features:
- Support custom uploads, plugins, theme folders, and more
- No limitations on host or operating system
- Support a vast range of hosting providers
- Intelligent and flawless auto-replacement of website URL during import
How to migrate your WordPress website?
Install and activate the All-in-one WP Migration plugin on your WordPress website. After successfully being installed and activated, you can see the All-in-one WP Migration plugin in the website dashboard. Remember to take a backup before starting the migration process.
Now, click on the All-in-one Migration link on the dashboard menu. Here you will see the “Export To” button at the bottom and click on it. Choose the files (can exclude files if not necessary) and click the “Export To” button. Then choose where to Export your file. If you are using the free version then you will file the option only and for other advanced options, you must get the premium version.
After choosing where to export the plugin starts to export files which might take some time according to the file size. Once it’s done, you will see ‘Download’ and click on that button which will download the files to your device. Download complete, now you are ready to move on to the Import process.
Now open your destination server/website and go to All-in-one>import. Click on the import button and select the file, it will take some time to upload files, and once it is done click on proceed. Depending on the speed of your host, it will take some time. After completion, you need to log in to the new site with the login details of the old site and save the permalinks twice.
Wpbackitup

Overview:
WPBackItUp, which was first released in 2012, is a popular tool for website migrations and moving hosting providers. This WordPress migrator allows you to perform easy migrations without the need for sophisticated coding or FTP access. You won’t need a cPanel or MySQL, and you won’t require any technical skills.
As a result, it’s a great plugin for newcomers and webmasters who don’t want to become too technical and just want to perform quick, secure migrations. Today, it has over 10,000 active users.
Features:
- Cancel your backup plans anytime.
- Fast backup of your entire site.
- Unlimited backups are available.
- Works on all WordPress platforms (Windows, Linux, and even Azure).
- Notifications are sent to you via email after every backup.
How to migrate your WordPress website?
Install and activate the WPBackitup plugin on your both WordPress website and take a backup of your website which you want to migrate. Then upload the backed-up file into the new/destinated website. To upload a backed-up file go to WPBackitUP restore page and go to the upload. Select the file and upload the file. Now you can see the file in available backups and on the right side of the file you will see restore and click on that. It will take some time and WPBackitUP will restore all the files of the selected file.
You have successfully migrated your current website to a new website. Now go to update permalink settings and click on save changes.
Backup Guard

Overview:
BackupGuard, like many of the other plugins on our list, is a WordPress plugin that doubles as a backup and migration tool. Because migration and backups work in similar ways, this will most likely be the case.
The plugin has a simple UI that is less intimidating than some of the other tools, making it ideal for novices.
There are a variety of plans and pricing choices available with this plugin. Backup and restore options, cloud connectivity with Dropbox, and a license for one website are all included in the free plan. The commercial version adds a second website, email notifications, FTP or SFTP backups, automated backups, cloud integration, and restoration for OneDrive, Google Drive, Dropbox, and others. It has over 60,000 active installations, today.
Features:
- Backup files, database or both.
- Option to cancel the backup process.
- The multi-site network is supported.
- Alert before updating (Premium).
- Upload to Dropbox.
How to migrate your WordPress website?
First of all, sign up in BackupGuard activate your account, and sign in. Then go to cPanel of your website then find FTP accounts and click it. Select one of them or create a new one then go to database credentials. Copy the values of DB_NAME, DB_USER, DB_PASSWORD and DB_HOST constants. Now go back to your website and click on Backup now.
Then create the destination FTP and DB sources. Then go to backup> click on the Restore button. Insert the information of the new server’s credentials and click Start Restore. Now go to wp-config.php of the new website and change the database credentials to match the new server’s credentials. Then change the value of the site URL inside the wp-options DB table. Your website will be successfully migrated.

Backup buddy
Overview:
BackupBuddy is a paid WordPress plugin that is extremely simple to use and has a large following among WordPress users. It’s been around since 2010, and over 100,000 WordPress sites use it.
BackupBuddy, as the name suggests, was created primarily as a WordPress backup service, but it also works well for site migration. When transferring to a new domain, built-in functionality makes it simple to move hosts or servers, change your domain, and automatically modify URLs.
Built-in WordPress migration functionality, WordPress clone, and staging & deployment feature to easily update changes to existing sites from a staging environment are all included in the developer license.
Features:
- Schedule your backups.
- Instant email notifications.
- Downloadable zip files.
- Offers restoration tool ImportBuddy.
- Send your backup files to remote backup storage locations.
How to migrate your WordPress website?
First of all, install Backupbuddy on your website and take a backup of your website. Download the zipped backup and import buddy to your computer. Then upload the files to your new server which will take some time depending upon the file size. And then create a new database and give the unique name to that database then create a new user, generate the password, and add the user to the database.
Now go to yourdomain.com/importbuddy.php to which you’re migrating the WordPress website. Enter the buddy password and click ‘Authenticate” then click “Restore Backup”. Check if all the information is correct and click on “Next Step”. Now go to Permalinks and click on save changes.
Wp Migrate DB
Overview:
WP Migrate DB exports your WordPress database as a MySQL data dump, does a find and replace on URLs and file paths, and handles serialized data before saving it as a SQL file. Then, using a database management tool like phpMyAdmin, manually import this SQL file.
This plugin is best suited to developers and individuals who are familiar with working in the WordPress backend, as it is more technical and “hands-on” than other migrating plugins. Rather than producing an exact clone of the original site, it’s a wonderful solution for individuals who want more control over migration and backups and it has over 300,000 active installations.
A pro version of the plugin is also available, which includes capabilities like the ability to push and pull databases for staging and deployment, database backup before migration, pause and restart a migration, and filtering out tables, post kinds, and other unnecessary data.
Features:
- Fully supports serialized data and arrays
- Can find and replace content within serialized arrays
- Easy to migrate WordPress website
How to migrate your WordPress website?
First, install and activate WP Migrate DB on both source and destination WordPress. Once done go to Tools>WP Migrate DB. Then on the destination WordPress checks the Export Files and copies the entire files. Then go to source WordPress and paste the copied entries to replace the text box. Now click on Export. Will take some time. Now copy themes, plugins, and uploads of wp-contents of source WordPress to wp-contents of the destination WordPress via FTP or a method of your choice.
Then import the database with phpMyAdmin. Once the import process is done the destination WordPress will have all contents, users, settings, and others of the source WordPress, which means the migration is successful.

Blogvault
Overview:
When it comes to migration and backups, BlogVault is a brand you can trust. It is the quickest and most effective WordPress migration plugin available. The plugin has assisted with website migrations for nearly a decade and has completed over a million successful WordPress migrations.
Although it is only a paid version WordPress migration plugin it has over 90,000 active installations today.
Features:
- Built-in free staging.
- Personal support for every customer.
- Manage multiple sites with a single dashboard.
- Real-time backup for WooCommerce stores.
- Provides incremental backup and effortless restoration.
How to migrate your WordPress website?
Install and activate Blogvault on your WordPress website. And then take a backup of the website. Now open BlogVault’s dashboard and go to Backup>Migrate. Then enter the FTP credentials of your current hosting then scroll down and click on Continue. Now select the folder where the WordPress website is located and click on Continue.
After that insert the URL of the website in the destination URL. If you want to change Name Server and IP then go to Advanced Option below and once all is done click on Continue. Now Blogvault will start to migrate your website which might take some time.
WP Clone by WP Academy

Overview:
WP Clone is a newly revitalized, semi-crowd-funded WordPress migration plugin produced by developer WP Academy and accessible under a variety of terms of service.
You won’t need a cloud storage service or an FTP site because the site and database will be backed up to Clone’s servers before being moved. It performs this cloning and migration without duplicating the system files, instead of taking backups of the database and user-created data, substantially speeding up the migration process and reducing downtime overall. It has over 100,000 active installations.
Features:
- Does not require FTP access to backup files you migrate or clone
- Creates user content and database backups to reduce upload time for migration and improve the security of your website.
- Fetches the site backup via your host’s direct
How to migrate your WordPress website?
Install and activate WP Clone on your website and go to “WP Clone” from your website dashboard. Then create a backup. Once the backup is completed, you will see a directory file where your backup is at. Now you can log in to another WordPress backup, install the WP Clone plugin, and cut and paste the URL you want to restore from. This will take all of your data and put it on your new WordPress installation.
Jetpack
Overview:
Jetpack is a suite of tools that allow you to easily backup and move your data. It’s designed to help you market your website by providing real-time security inspections and backups. It will also assist you in synchronizing each modification, media asset, comment, or website post.
This plugin is also simple to use, especially if you want to view the download or backup history while uploading themes or plugins. Its backup includes the ability to restore your current website’s FT and SSH connections. Jetpack Backups is now integrated with Jetpack and allows you to backup, restore, and migrate your website. It has over 5 million active installations.
Features:
- Easy design tools.
- Supports Google Analytics.
- Social media integration.
- Speed optimized and great performance.
- Fully compatible with the AMP plugin and all other plugins.
How to migrate your WordPress website?
Install and activate the Jetpack plugin in your existing WordPress website. Then open your dashboard and go to Jetpack>VaultPress. Click on settings and provide a site URL (SSH, SFTP, or FTP). Once you insert all information it will backup your files. It might take a long time so keep patience. Once done, go to Backups>Alternate option under settings.
Insert the information of the Host server where you want to migrate. Then it will start to migrate. Now go to your Domain Provider and change DNS settings.
Confused? Don’t know what to look for or how to choose the best WordPress migration plugin?
Have you chosen any plugin among the best WordPress migration plugins above or you are more confused than before? Don’t worry it’s normal to be confused when you have this many options to choose the best WordPress migration plugin for your WordPress website.
Here are some simple tips to look at the plugins to choose the best one among them for you:
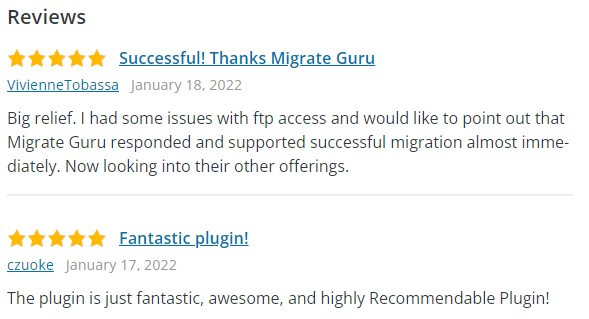
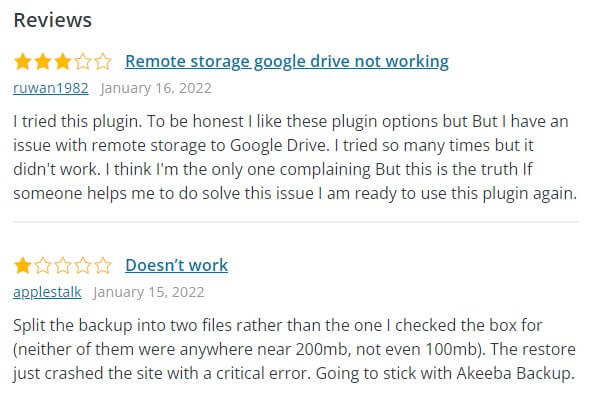
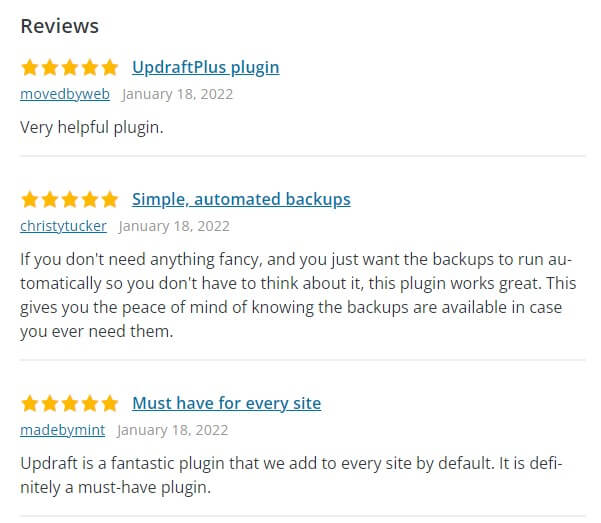
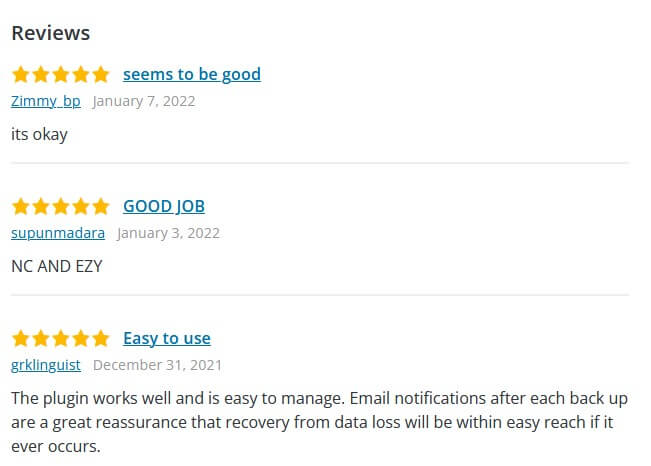
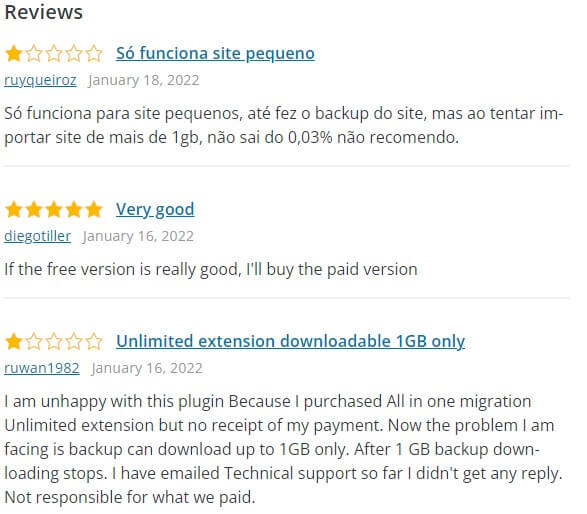
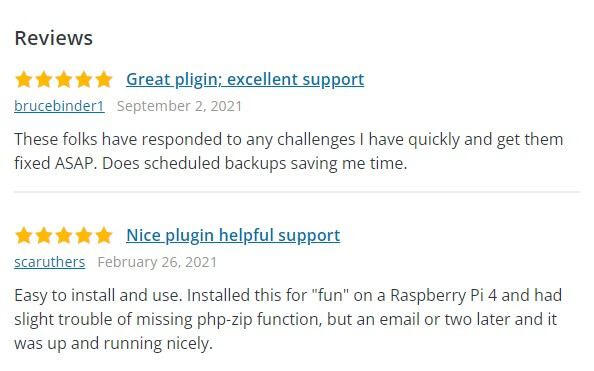
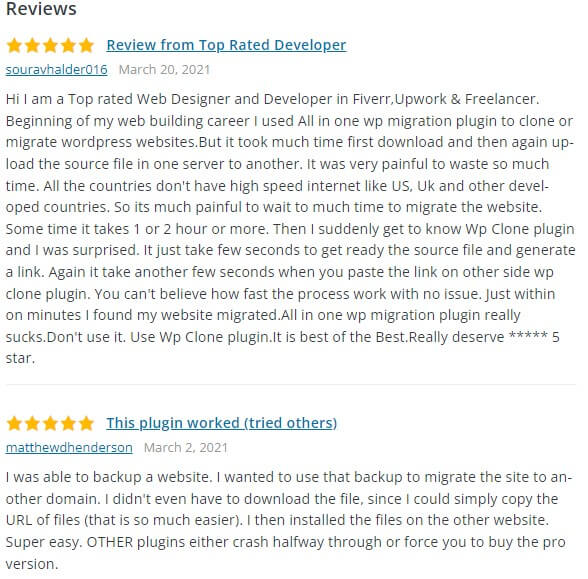
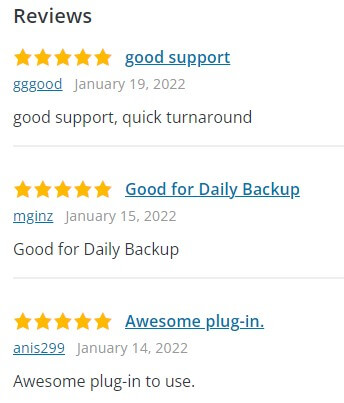
- High ratings and positive reviews
When looking for a plugin, the rating and amount of good reviews are the most crucial factors to consider. The plugin should ideally have a 4- or 5-star rating and a good number of positive reviews.
This means that the plugin is not safe to use, although it does provide the necessary functionality.
The recommendations above apply to both the official plugin repository and the third-party marketplace. However, what if you downloaded a plugin from a third-party developer?
In this scenario, a Google search for plugin reviews is recommended. Simply type the plugin’s name followed by the term reviews. You will get plenty of blogs related to themes and plugins so you can look at those for more information.
- Look for signs of active support
Checking the review rate and positive reviews is not enough so you must check the active users of the plugins too. Sometimes the review and active users don’t match because you will get lots of reviews let’s say hundreds but if the active user is least than the review then this can be spam. So after checking the reviews you must look at the active users of the plugin.
You can see how many help threads there are and how many have been resolved in the official repository. Look for a section labelled support when downloading plugins from third-party websites, or contact the plugin author directly to inquire about their support policies.
- Check update frequency
Reviews and rating check, active installation check, now look for how often the plugin update and check whether they have solved the issues in the previous version or not. The plugin’s frequent updates indicate that it is still being actively developed, so you don’t have to worry about the creator abandoning it in the future. Installing a plugin that hasn’t been updated in more than 6 months should be avoided. This could result in you using an out-of-date plugin, leaving your site open to unwanted hacking efforts. So look for another option.
- Make sure it does what you need it to do
Finally, make certain that the plugin contains the capabilities you require. When it comes to migration plugins, make sure they can move your database, as well as your theme, plugins, and WordPress files.
If you want to relocate a multisite installation, make sure you use a plugin that can handle it. It’s also a good idea to use a plugin that allows you to generate a backup of your site before migrating it, as well as exclude specific files if you don’t want them migrated.
Final thoughts
Here, we have tried to give you as much information we get as we feel you need to know. You can choose any of the above best WordPress Migration Plugins for your website by looking at their features and your website requirements.
But if you ask then I will say Everest Backup Plugin will be the best WordPress migration plugin for your website. You don’t need to get a premium version to migrate and clone your website. And for other advanced options only you need to pay.
Yes, it’s a new migration plugin but if the plugin provides the best services then why not try it. You don’t have to pay to try this plugin on your website and who knows you might love this plugin because of the easy interface and human-readable log.
If you have any queries regarding Everest Backup Plugin then contact us. Our respective support will contact you as soon as they will get an inquiry from you.