In today’s evolving digital landscape, establishing a robust online presence is vital for professional advancement, whether you’re an influencer, blogger, or business magnate.
A well-crafted website is essential for showcasing your brand or company, enabling people to gain insights & to know more about you. WordPress stands out as a popular CMS choice, simplifying the creation of stunning websites.
Developing a professional WordPress site involves acquiring a Domain Name & Hosting. However, setting up and experimenting with a live website isn’t always practical. This is where XAMPP comes into play.
This article guides you on building a cost-free professional website using XAMPP on your PC or laptop. This tool allows local development and testing before going live.
Once you’ve honed in WordPress website creation, you can proceed to invest in domain and hosting or seamlessly migrate your locally developed site to new providers.
What is XAMPP?
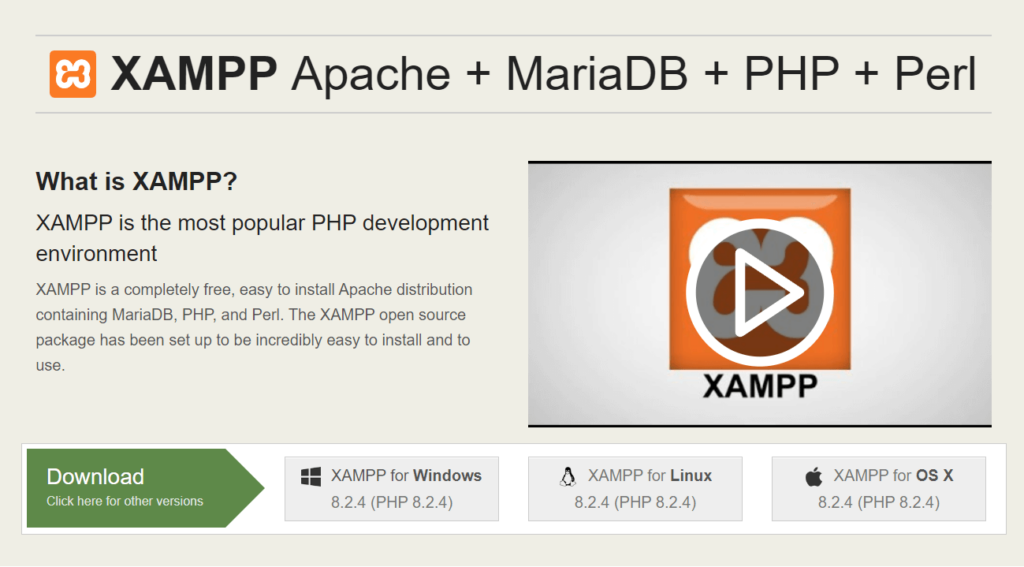
XAMPP stands for Cross-Platform, Apache, MySQL, PHP, and Perl. It is a completely free and open-source web development environment that provides all the tools necessary to create and test web applications locally.
It bundles together a web server (Apache), a database server (MySQL), and scripting languages (PHP and Perl) in a single package. It is a popular choice for developing and testing websites on a local computer. It supports all kinds of systems like Windows, Linux and macOS.
How to use XAMPP?
Using XAMPP is relatively straightforward. Once installed, it simplifies the process of creating a web server environment on your local machine, allowing you to test websites before deploying them online.
The friendly interface and easy setup options make it good for both beginners and experienced developers.
To get started with XAMPP, follow these steps:
Download and Install XAMPP on Your Computer.
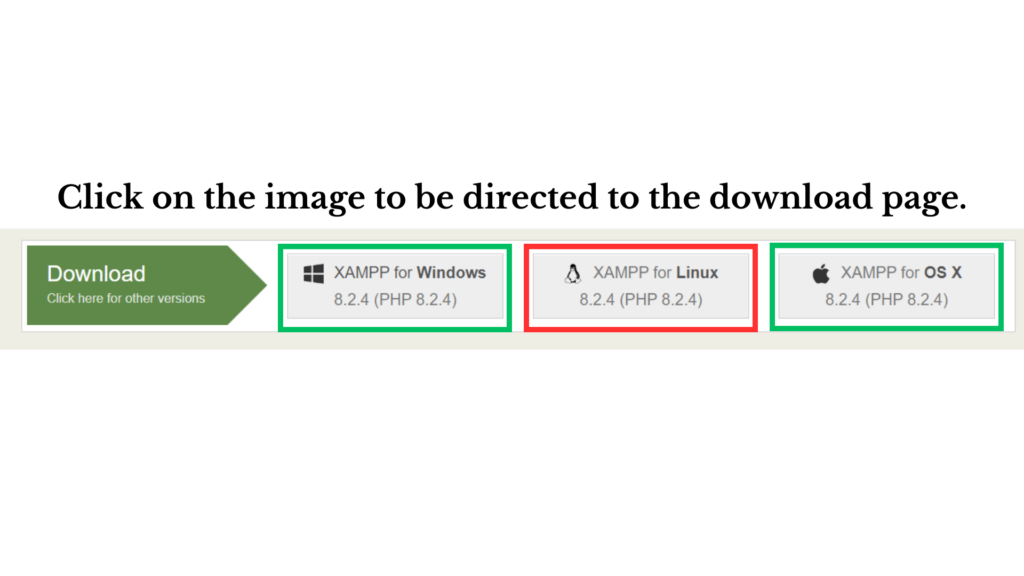
Follow the given steps to download and install it on your computer.
- Download XAMPP: Visit the official XAMPP website by clicking on the above Image and download the suitable version for your operating system (Windows, macOS, or Linux).
- Install XAMPP: Once the download is complete, run the installer and follow the on-screen instructions. During the installation process, you can customize which components of XAMPP you want to install, e.g., (Apache, MySQL, PHP, etc.). Usually, it is recommended to install all the default components to have a complete local server environment.
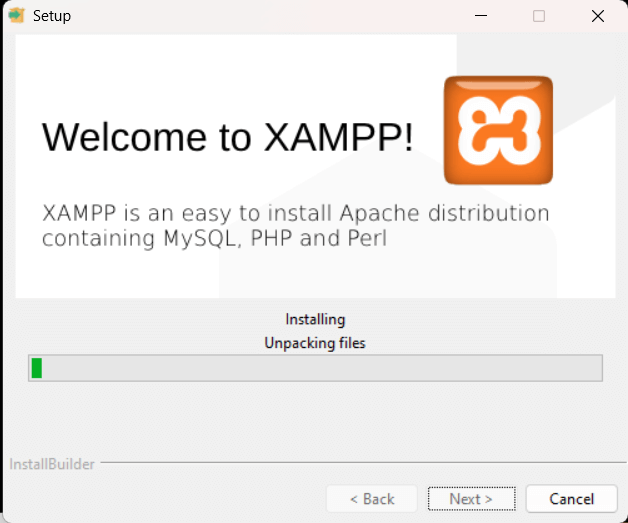
- Select Installation Folder: Choose a location on your computer where you want to install XAMPP. The default location is usually fine.
- Complete the Installation: Follow the instruction to complete the installation process. Once installed, you can launch XAMPP and start the Apache and MariaDB servers by clicking on the corresponding buttons in the control panel.
Download and Install WordPress in XAMPP?
With XAMPP up and running, it’s time to set up WordPress on your local machine. Follow the following Steps:
- Download WordPress: Visit the official WordPress website and download the latest version of WordPress as a zip file.
- Extract WordPress Files: After downloading, extract the WordPress zip file and keep it in a new folder name ‘WordPress.’
- Move WordPress Folder: Navigate to the XAMPP installation directory and find the ‘htdocs’ folder. Move the ‘WordPress’ folder into the ‘htdocs’ folder.
- Set Up a Database: Open Your XAMPP Control Panel. Start this two Module and then click int SQL- Admin. It will take you to the phpMyAdmin interface.
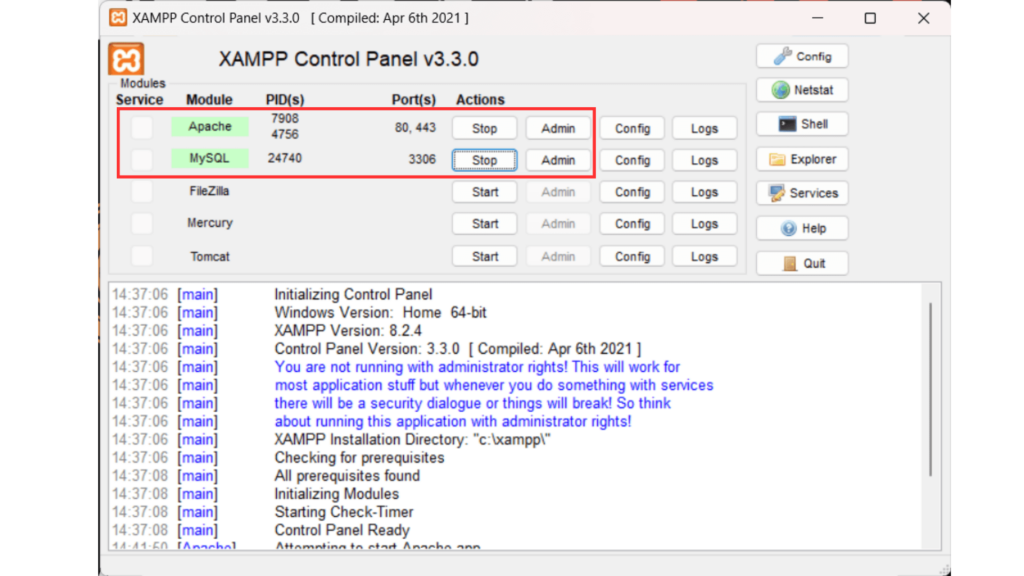
- You can also type manually: Open your web browser and type (http://localhost/phpmyadmin/) Hit enter. The localhost will only open when both module will be in running mode. Here, you can create a new database for your WordPress site. Choose a name for your database, and remember it for later.

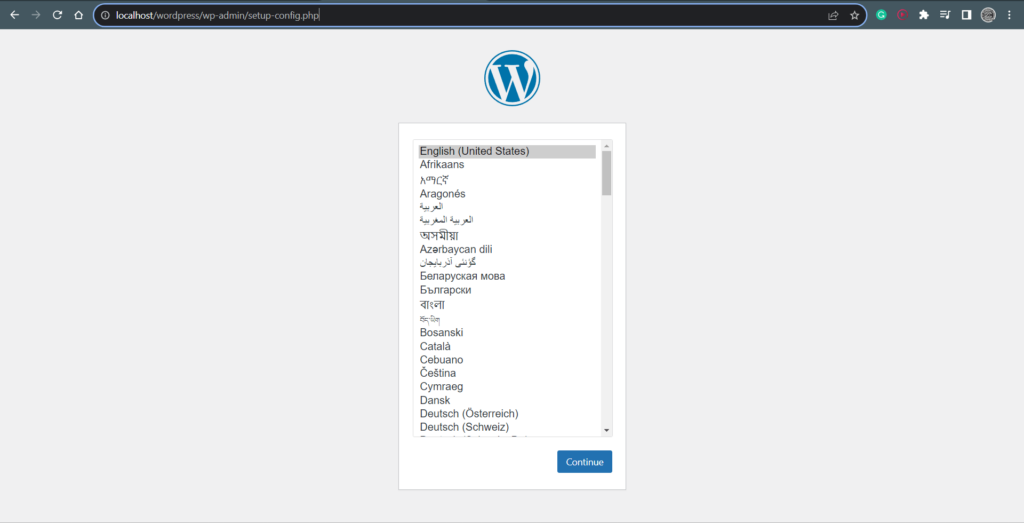
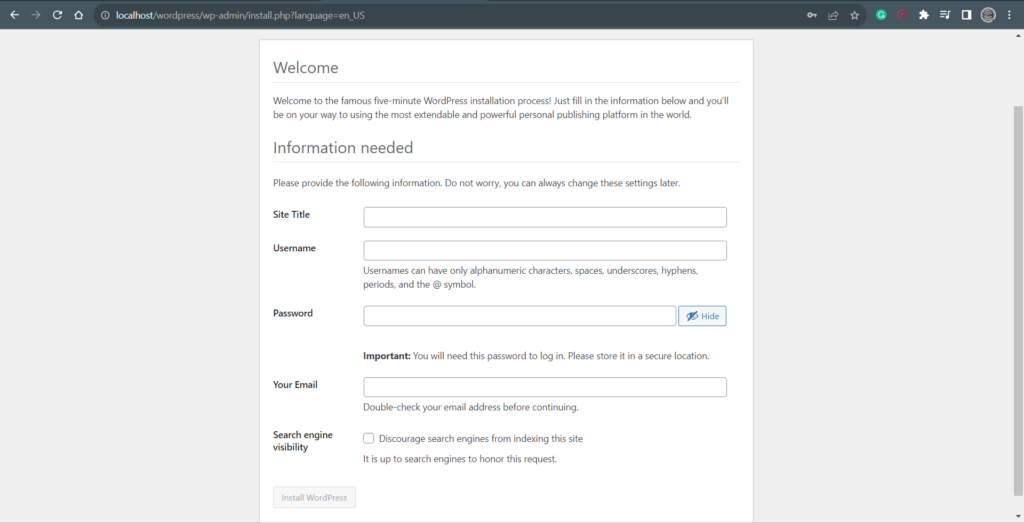
- Configure WordPress: Open a web browser and type or go to (http://localhost/wordpress/). You will be asked to select your language and then set up the database connection.
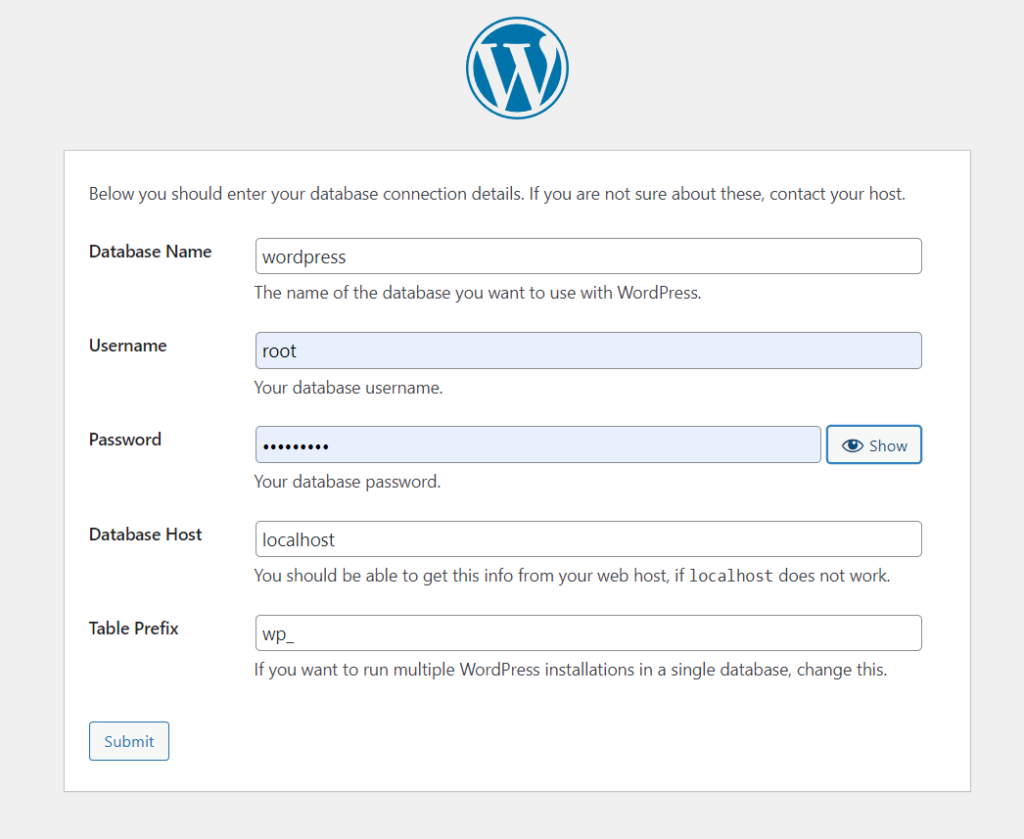
- Follow the on-screen instructions to configure your WordPress installation, providing the necessary database details such as database name, username, and password.
- Enter the database name, username (‘root’ by default), and leave the password field blank or else keep your desire password.
- Complete Installation: Follow the on-screen command to complete the WordPress installation. It will request you to give a site name, username, email and password for your WordPress administrator account. After entering this information, click “Install WordPress” again.
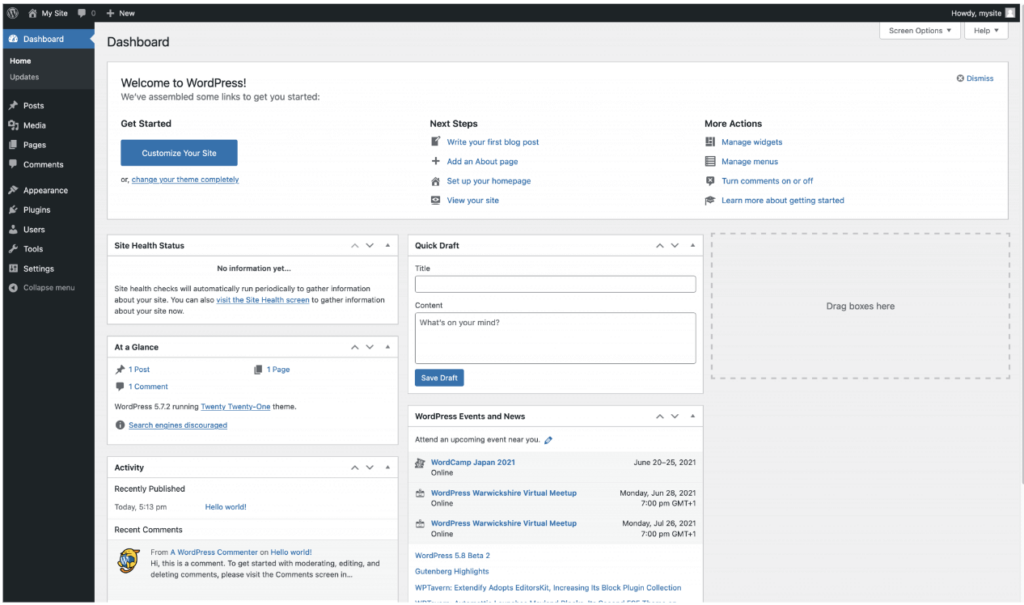
Congratulations! You have successfully installed WordPress using XAMPP on your computer.
To Learn about Elementor and how to design WordPress website with Elementor Read This Article.
After successfully installing WordPress on the XAMPP, the next step involves creating an entirely new website and customizing it just as you would with a domain and hosting service.
Let’s get creative:
- Access WordPress Dashboard: Visit http://localhost/wordpress/wp-admin/ after installation. Log in using your installation-set username and password.
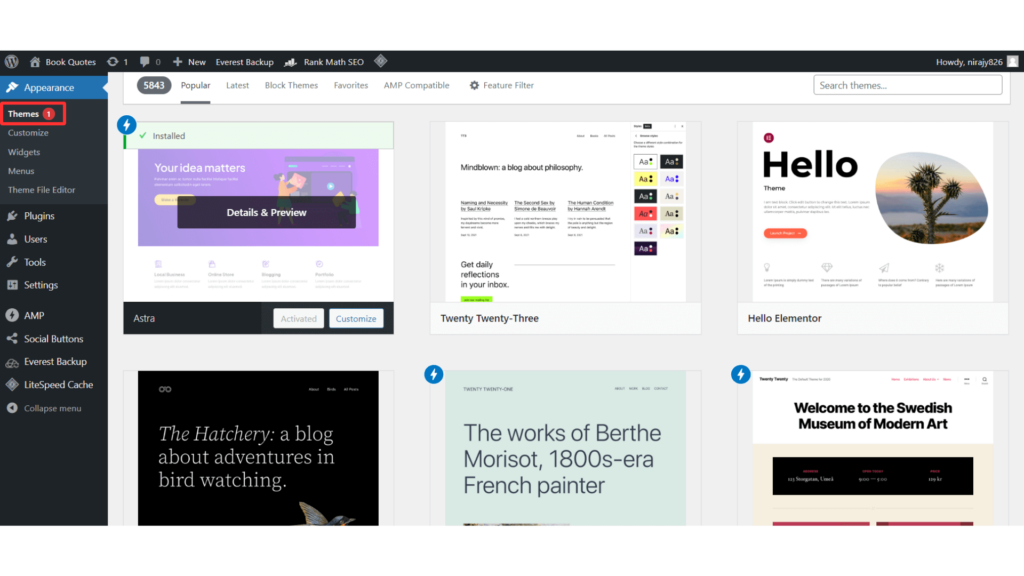
- Choose a Theme: Click “Appearance” in the left sidebar, then “Themes.” Explore and install a free or premium theme that suits your website’s purpose.
- Customize Your Website: Navigate to “Appearance,” then “Customize.” Here, you can customize your site’s title, tagline, logo, colors, fonts, and more. Customization options may vary with the theme.
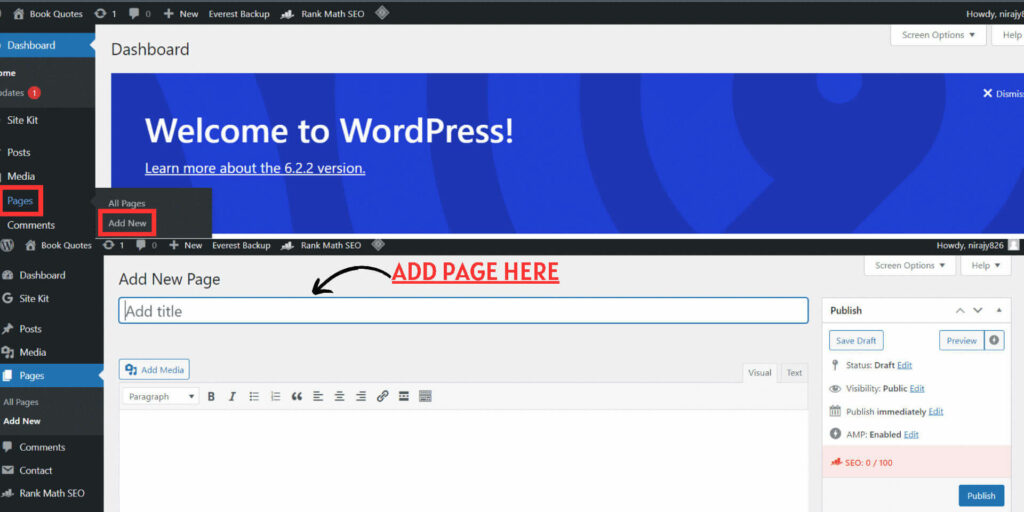
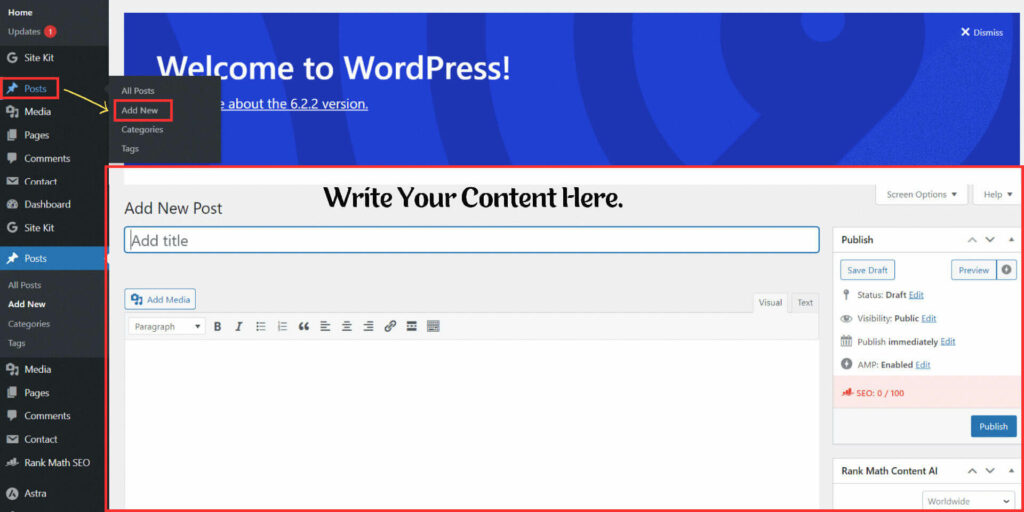
- Add Content: Create new pages or posts. Go to “Pages” or “Posts” in the left sidebar, then “Add New.” Utilize the built-in editor to add text, images, videos, and format content.
- Install Plugins: Enhance functionality by installing plugins. Go to “Plugins” in the sidebar, click “Add New.” Search for plugins, e.g., SEO, contact forms, social integration and more.
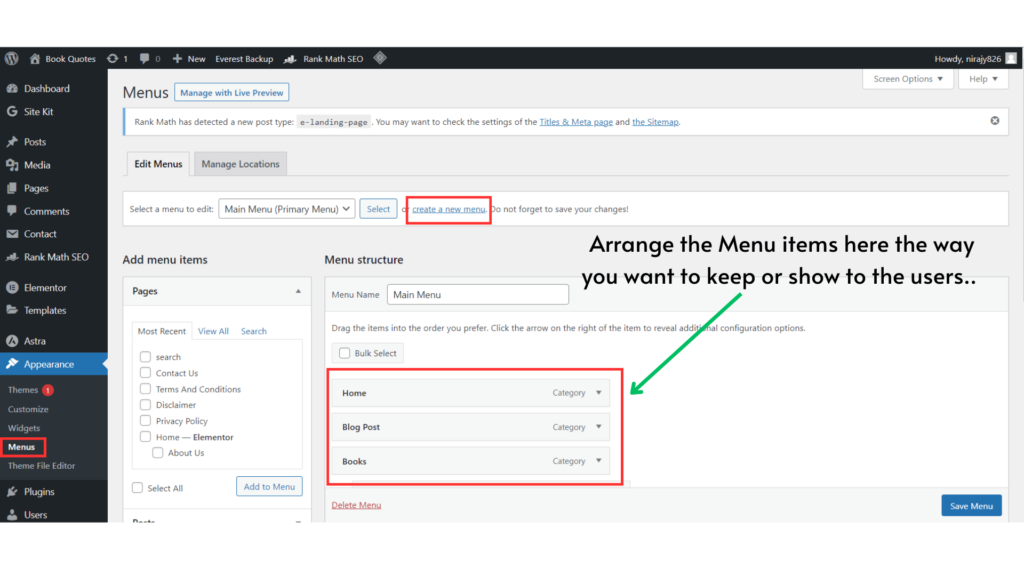
- Menus and Widgets: Use the “Menus” option to create and customize navigation menus. Drag and drop widgets in the “Widgets” section to add features like a search bar, recent posts, categories, and more to your site’s sidebar or footer.
Summary:
XAMPP is a great tool for developing and testing WordPress websites on a local computer. It is easy to use and set up, and it provides all of the software you need to get started. If you are new to WordPress, I recommend using XAMPP to create your first WordPress website. The local setup provides you with a safe space to experiment, test, and refine your WordPress website before taking it live.
By following these detailed instructions, you can create and test your WordPress website offline. XAMPP provides a convenient and efficient way to develop your website before deploying it to a live hosting environment. So, get started now and unleash your creativity with WordPress and XAMPP!
Discover the ins and outs of the Elementor page builder and master the art of designing websites using Elementor by reading this informative article. https://wpeverestbackup.com/make-website-with-elementor/