In this modern digital age, having a website is essential for personal branding, businesses, and information sharing. Creating it can be a daunting task, especially if you’re not a coding expert.
But fear not! Elementor Page Builder comes to the rescue, making the whole process a breeze. Whether you’re a savvy student or a complete newcomer to web development, this guide has got you covered.
In this article, we’ll walk you through the simple steps of using Elementor to craft a fantastic website that looks professional and polished.
Let’s dive in and get started on your online journey!
What is Elementor?
Elementor is a popular WordPress page builder plugin that helps users to create and customize websites with ease. It provides a user-friendly drag-and-drop interface, allowing users to visually design web pages without requiring coding skills.
It also offers a variety of widgets and templates, enabling users to construct responsive and visually appealing websites efficiently. With over 5 million active installations, it is one of the most widely used page builders available.
Why use Elementor?
There are several reasons to choose Elementor for building your website. Here are a couple of advantages:
- No need for coding skills: With Elementor, You can create your website without understanding coding languages. It’s a simple drag-and-drop tool.
- Visual editor: It provides a visual editor and makes it easy to preview your website’s appearance before it goes live.
- Versatile layouts: You can create various layouts for your website using Elementor, whether it’s a simple one-page site or a complex multi-page one.
- Wide widget selection: It includes a collection of ready-to-use widgets. These widgets allow you to insert content like images, text, videos, and forms.
- Free and paid options: It offers both a free and a premium version. The free version works well for basic websites, while the premium version offers extra features and capabilities.
How to make a website with Elementor?
- Choose a Domain Name and Hosting Provider.
- Install WordPress.
- Choose a Theme/ (Set Up Your Website’s Design and Layout).
- Install Elementor Plugin.
- Familiarize Yourself with the Elementor Interface.
- Create a new page.
- Design and Customize Your Page.
- Add- Sections and Columns.
- Add & Customize Elements (Widgets).
- Save and Publish Your Page.
- Create More Pages.
- Mobile Responsiveness.
- Menus and Navigation.
- Regular Updates.
- Customize Your Website Further with Elementor Pro (Optional).
Step 1: Choose a Web Hosting Provider & a Domain Name.
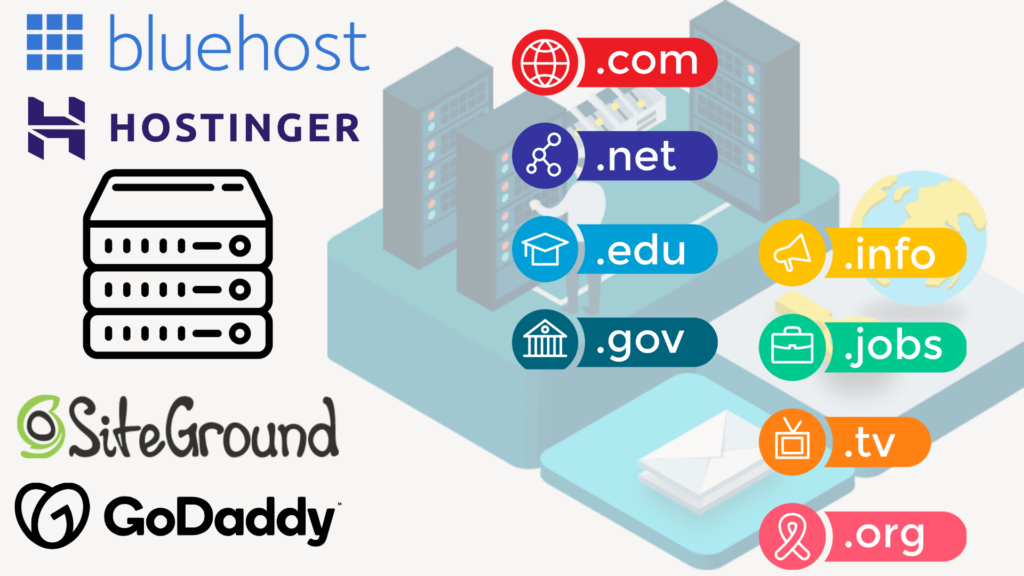
Before you begin creating your website using Elementor, you must first get a Domain Name and web hosting service. Your domain name should reflect what your website is about and be simple to remember. Hosting is similar to renting a space on the internet where your website’s files are stored.
There are several affordable options available, such as Bluehost, SiteGround, Godaddy or Hostinger.
Step 2: Install WordPress.

WordPress is a content management system (CMS) tool for managing websites, letting you make and control your site without much difficulty. Many website hosting services let you install WordPress with just one click, so starting your website is fast and easy.
To get it done, sign in to your hosting account, locate the WordPress setup choice, and obey the directions to finish setting it up.
Step 3: Choose a Theme.
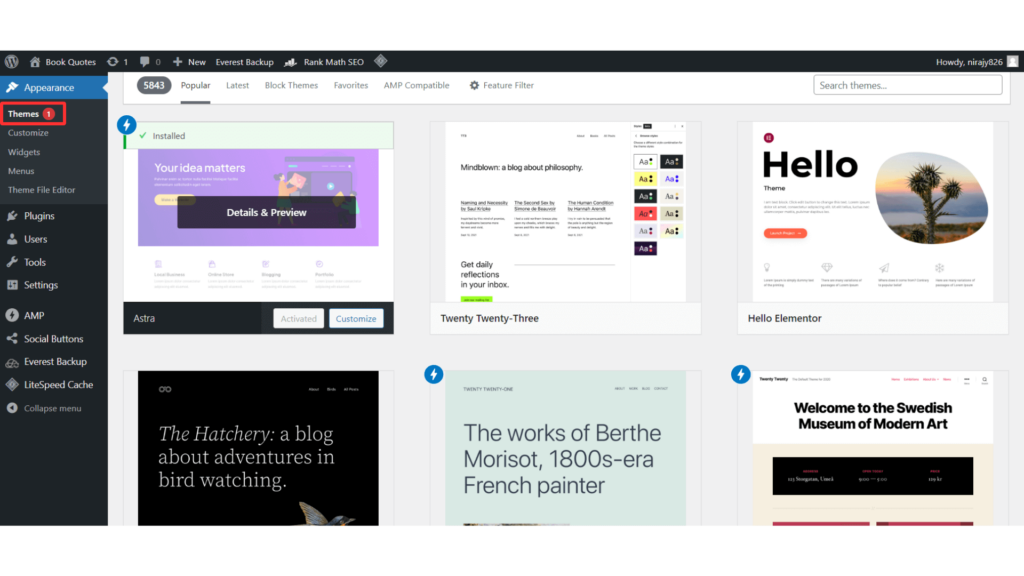
Once WordPress is installed, it’s time to start building your website’s design. Begin by choosing a suitable WordPress theme. It is a pre-made design that you can use to style your website.
Many free and premium themes are available, and you can preview and install them directly from your WordPress dashboard. Pick a theme that matches your website’s content and niche, then proceed to install and activate it.
To know more about the free and lightweight themes, Read this article. (https://wpeverestbackup.com/best-lightweight-wordpress-themes/)
Step 4: Install Elementor Plugin.
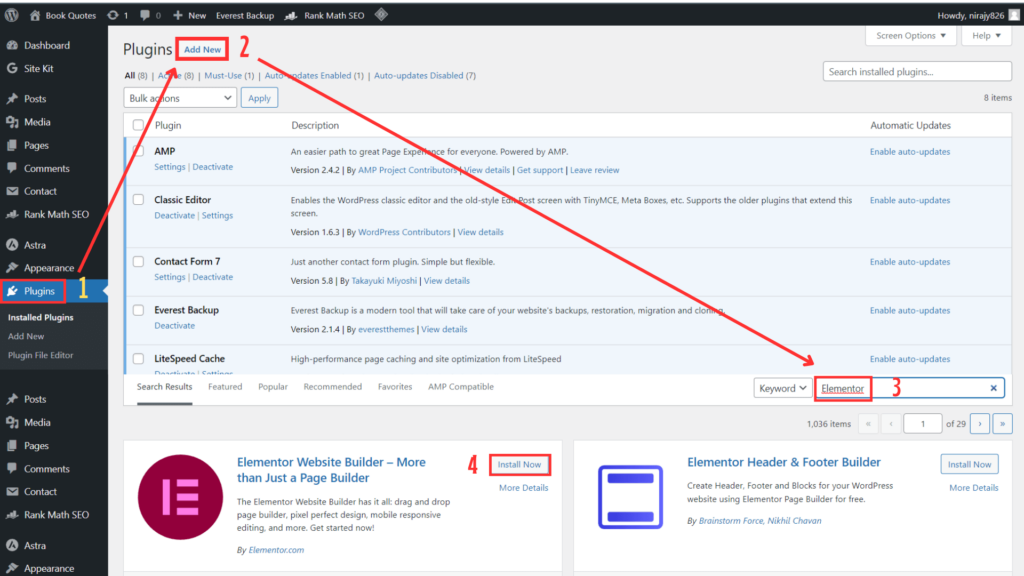
Now that you have your WordPress website set up, it’s time to add the Elementor Page Builder plugin. From your WordPress dashboard, navigate to “Plugins” and select “Add New.” Search for “Elementor,” then click “Install Now.” After installation, click “Activate.” Elementor will now become part of your WordPress toolkit.
Step 5: Familiarize Yourself with the Elementor Interface.
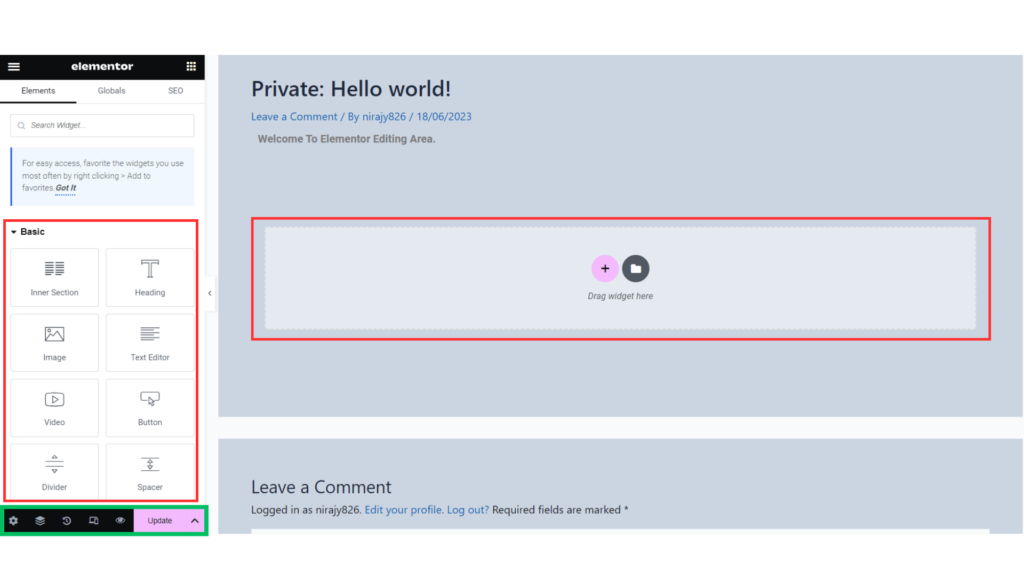
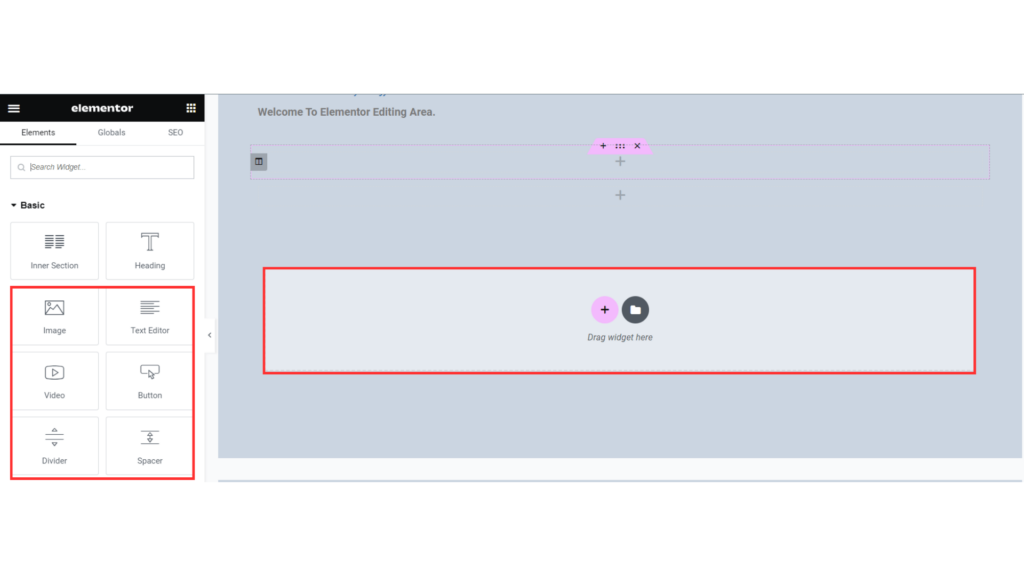
After activating Elementor, you can start creating your website with its user-friendly drag-and-drop interface. The interface consists of three main sections: the editing area, the widget panel, and the settings panel.
The editing area is where you design and arrange your website’s elements, the widget panel houses various content elements, and the settings panel allows you to customize each element’s properties.
Step 6: Create a new page.
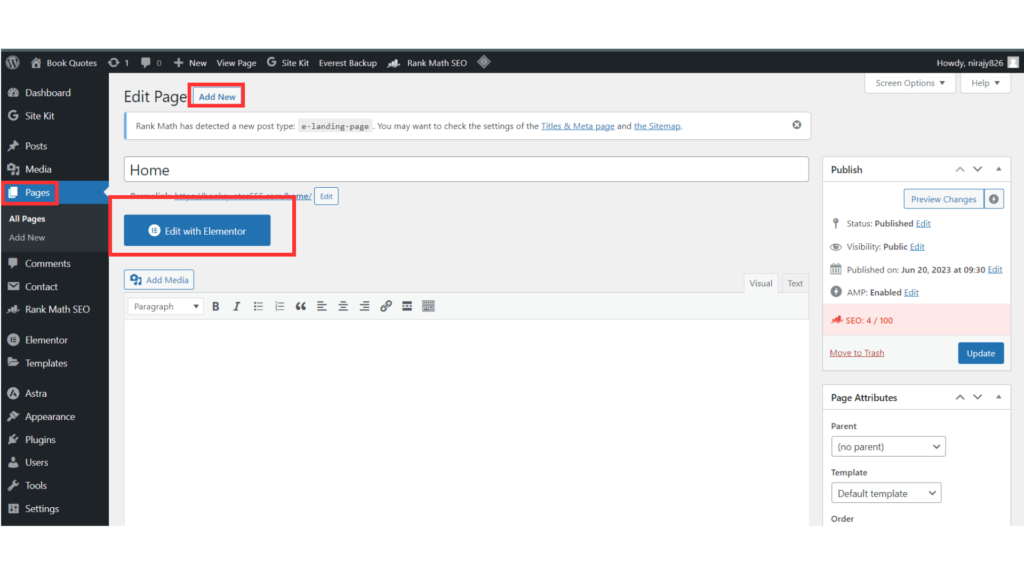
To create your first Page with Elementor, go to the “Pages” section in your WordPress dashboard and click “Add New.” Give your Page a title, then click the “Edit with Elementor” button.
You’ll be taken to the Elementor editing area. Here, you can begin building your Page by dragging and dropping content elements from the widget panel onto the editing area.
Step 7: Design and Customize Your Page.
Elementor offers a variety of content elements, like headings, text boxes, pictures, buttons, and more. Just drag and drop these pieces onto your Page and customize them how you want.
Using the Elementor settings panel, you can modify each element’s appearance, layout, and functionality. You can adjust things like font styles, colors, and backgrounds and even add animation effects. Elementor comes with a collection of ready-to-use widgets that you can put on your Page. You also have the option to include your own unique content, like images, text, and videos.
Step 8: Add- Sections and Columns.
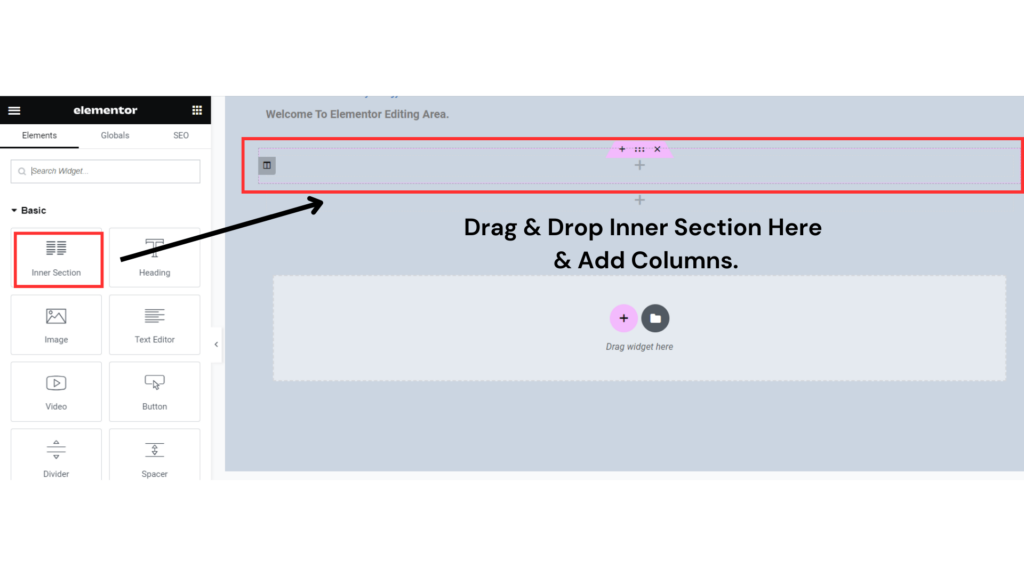
For organizing your Page, you can create sections and columns. Sections work as containers for your content, while columns help arrange elements next to each other.
Begin by dragging the “Section” widget onto your working area, and then add “Columns” inside the section to arrange your content effectively.
Step 9: Add & Customize Elements (Widgets).
Elementor provides an extensive selection of widgets for adding content to your Page. Whether it’s text, images, buttons, or videos, you can easily place the widget you desire into the columns by dragging and dropping.
To personalize these elements, click on them. You can modify text, add images, tweak colors, change fonts, and more. All these adjustments can be made using the settings panel located on the right side.
Step 10: Save and Publish Your Page.
Once you are satisfied with your design, click the “Save” button. You can also preview your Page to see how it will look to your visitors.
When your Page is ready, click the green “Publish” button in the bottom-left corner. You can choose to publish immediately or save it as a draft to publish later.
Step 11: Create More Pages.
Repeat the same steps to make more pages for your website, like an “About Me” page, “Contact” Page, a Blog page or a “Services” page. With Elementor, you can make as many pages as you want and connect them to make a complete website.
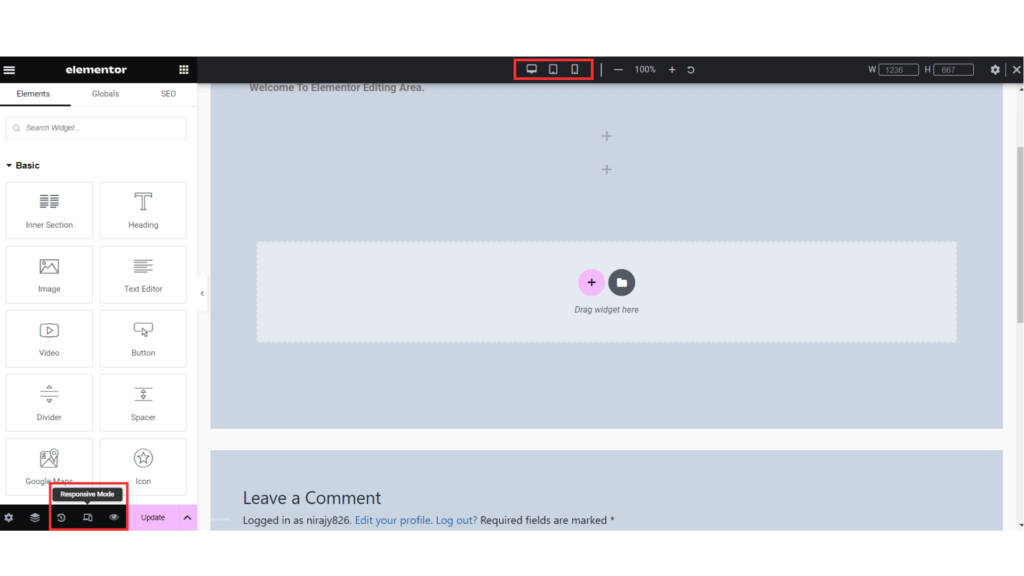
Step 12: Mobile Responsiveness.
Elementor simplifies the process of ensuring your website appears wonderful on every device.
Just click on the icons for mobile or tablet at the bottom of the Page to see how your design looks on various screen sizes.
This helps you ensure that your website is user-friendly and looks good whether people use phones, tablets, or computers.
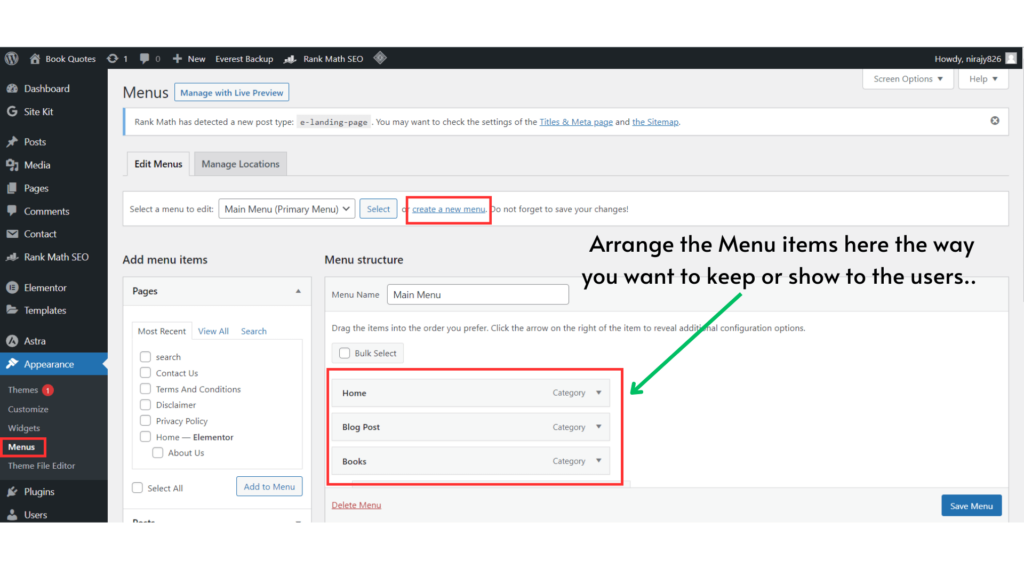
Step 13: Menus and Navigation.
To make it easy for visitors to move around your website, organize the menus.
In the WordPress dashboard, navigate to “Appearance,” then select “Menus.” Create a fresh menu, put in the pages you’ve made, and choose where you want the menu to be shown.
This way, visitors can easily find their way to different sections of your website and explore all the content you’ve created.
Step 14: Regular Updates.
Keep in mind that a website isn’t something that stays the same. Make sure to frequently update your content, add new blog posts, and improve your design when necessary.
This helps to keep your website engaging and relevant for your visitors, making them want to come back for more.
Just like how you refresh your wardrobe with new styles, your website needs a regular refresh to stay up-to-date and appealing.
Step 15: Customize Your Website Further with Elementor Pro (Optional).
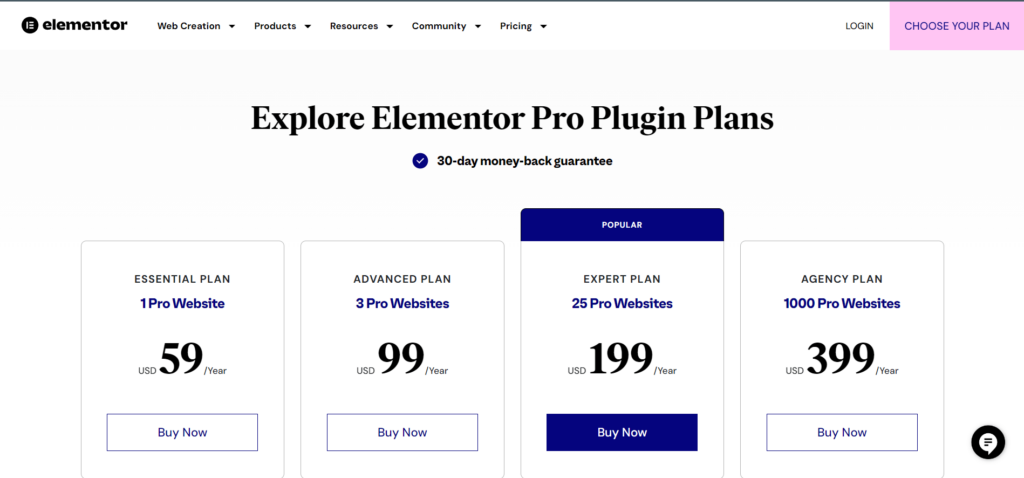
Elementor has a Pro version that comes with extra features and design choices. Although the free version works well, Elementor Pro opens up more opportunities. If you aim to enhance your website further, consider upgrading to Elementor Pro.
This advanced version offers things like creating your custom theme, using global widgets and linking with marketing tools. It’s like giving your website an upgrade to VIP status, so it can do even more cool things and stand out even better.
Here are some extra tips for building a website using Elementor:
- Utilize the visual editor to preview your website’s appearance before going live, which can help prevent mistakes and issues.
- Save time and energy by using the collection of ready-to-use widgets. They cover everything from images and text to videos and forms.
- Feel free to explore new ideas. Elementor is flexible, so trying out various options to find what suits you best is a great approach.
- Engage with the Elementor community for assistance. You’ll find many useful resources online, like guides, plugins, and templates.
I hope this advice is useful to you!