In this modern & digital age, having a website is crucial, whether for a personal blog, business venture, or showcasing your creative endeavors. The good news is that you don’t need to be a coding expert to create a professional-looking website.
WordPress is a user-friendly website-building tool and content management system that helps people create and manage websites without coding skills, making it easy for beginners to build their websites.
In this easy-to-follow guide, we’ll show you how to create a website using WordPress, using simple language that anyone, even a 15-year-old, can understand.
So, let’s get started and bring your online presence to life!
Step 1: Understanding WordPress
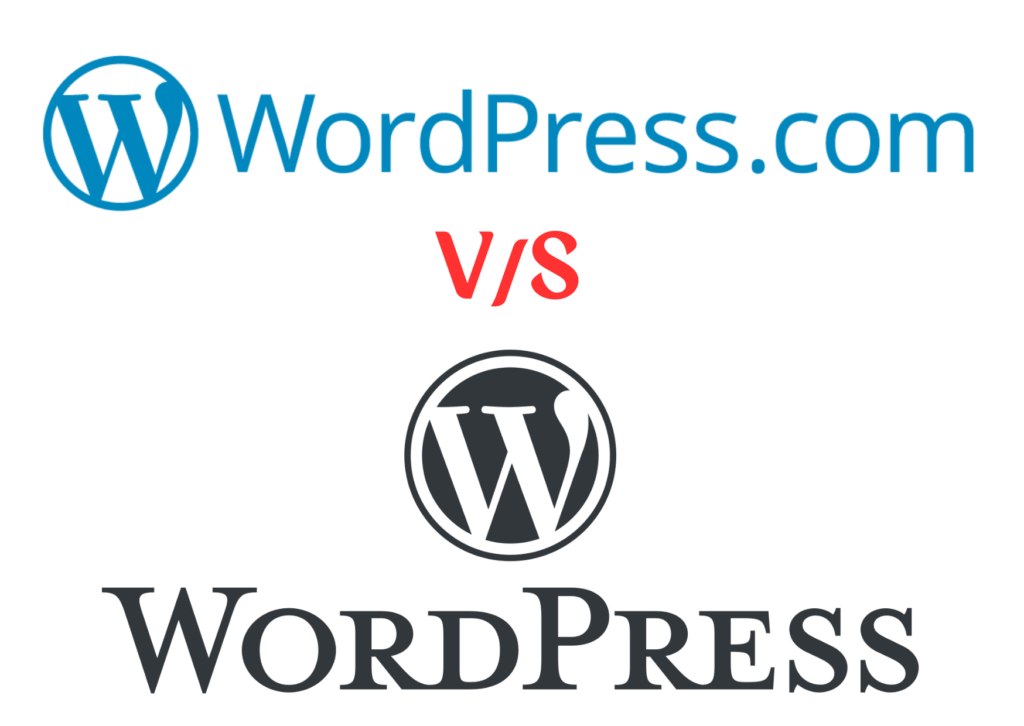
To begin your journey, the first step is to select the appropriate WordPress platform from the two available options: WordPress.com and WordPress.org!
WordPress.com and WordPress.org may share the same name but offer distinct experiences. WordPress.com is a fully-hosted platform that simplifies website creation by handling all technical aspects, such as updates and backups. This makes it an ideal choice for beginners or those seeking a straightforward, hassle-free process. However, it does come with a limitation: customization options are somewhat restricted.
On the other hand, WordPress.org provides self-hosted software, granting users complete control and freedom to customize their websites to their heart’s content. To avail of this option, users must arrange hosting and be responsible for maintaining their sites.
This makes it more suitable for tech-savvy individuals or businesses that desire total autonomy over their websites. Whether you prioritize convenience or flexibility, both versions empower you to craft impressive websites tailored to your specific needs.
We recommend WordPress.org as the best choice for beginners.
Step 2: Choosing Domain & Hosting Providers.

Before you start building your website, two essential things you’ll need are a domain name and a hosting provider. The domain name serves as the address for your website, like www.yourwebsite.com. It’s essential to choose a domain name that represents your brand or purpose effectively.
Once you have your domain name, you must select a reliable web hosting provider. This is where all your website’s files and data will be stored. Popular hosting providers like Bluehost, SiteGround, and Hostinger offer good performance and customer support, making them excellent options to consider.
With these two elements in place, you’ll be on your way to establishing an online presence smoothly.
Step 3: Installing WordPress
Setting up your WordPress website is a breeze with the help of hosting providers’ convenient one-click installation feature.
Once you’ve signed up for a hosting plan, head to your account dashboard, where you’ll easily find the “Install WordPress” button. Just click it and follow the simple instructions to complete the installation.
Many web hosting providers offer a user-friendly one-click installation option, making the process a piece of cake. If you prefer, you can also download the WordPress software from their official website and manually install it on your hosting server.
Either way, you’ll have your WordPress site ready to go in no time!
Step 4: Know your Dashboard
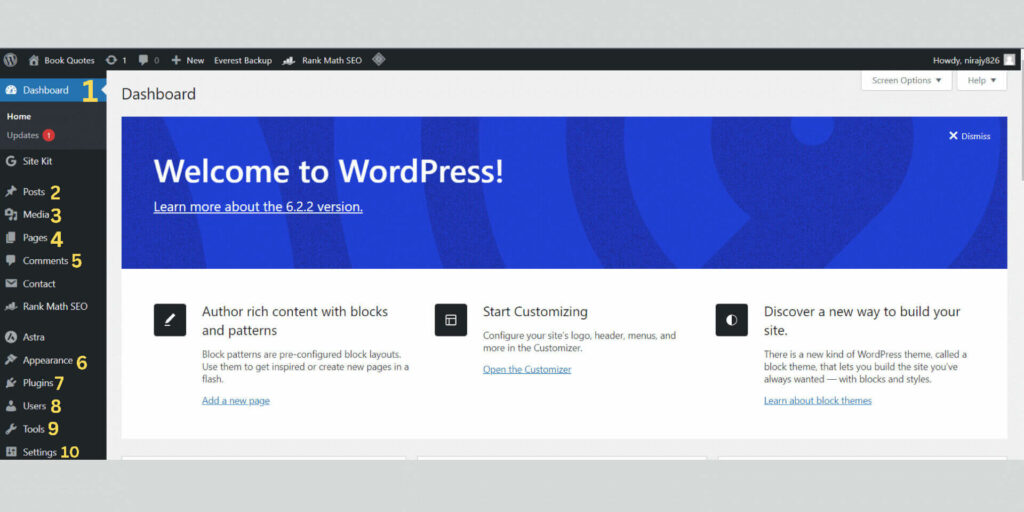
After installing WordPress, log in to your account and learn about the basic features of your dashboard explained below.
- Dashboard: It shows the current status of your website Like (Recent Comments, Posts and other Activities.)
- Posts: It helps to Create, edit and manage your content/blog posts on your site.
- Media: It helps to Upload, delete, manage, and other media files (e.g., Images).
- Pages: This is one of the main options in the list. It helps to Create, edit, and manage different web pages like (Home, Categories, Contact Us, About, Privacy Page, Terms and Conditions etc.)
- Comments: It helps to manage and see the recent comments in our blog posts.
- Appearance: This menu is like a soul for the website. It helps to Change the design, customize themes, and how elements should be displayed on the website.
- Plugins: It helps to Install or uninstall different plugins, such as Contact Form 7, RankMath, and Google site kit.
- Users: It helps to Manage the website user accounts.
- Tools: This menu helps to Check site health and import and export posts or comments from other systems.
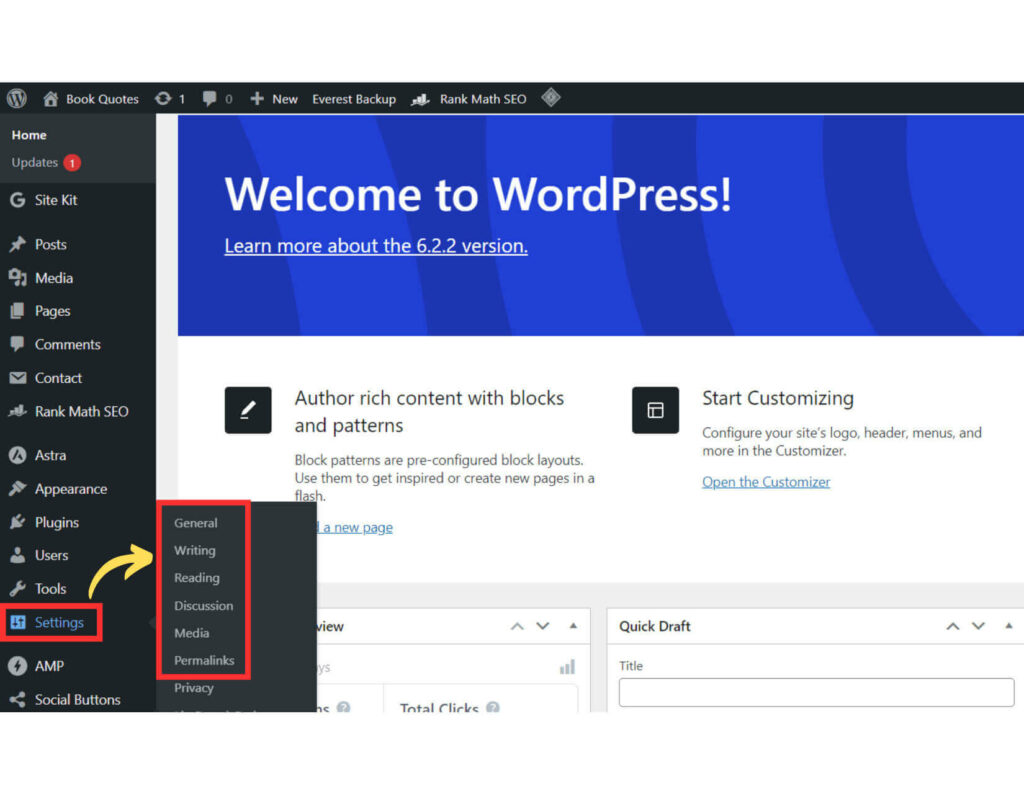
- Settings: It helps to change settings for your website. This includes general settings, such as reading, discussions, media size, permalink, and privacy.
Step 5: Choose the perfect theme.

When it comes to shaping the style and performance of your website, WordPress offers a vast array of free and premium themes. Picking the right theme that suits your content and objectives is vital. You can easily explore various themes directly from your WordPress dashboard or check out this article to learn more about the free and paid themes (Paste the link you have written). Or visit the platforms like ThemeForest for distinctive and visually attractive choices.
To select a theme, head to “Appearance” in the WordPress dashboard, click on “Themes,” browse through the options, find the one that catches your eye, and click “Activate” to give your website a whole new look!
Step 6: Customization and add essential pages.
Once you’ve chosen a theme, you can make your website truly your own and represent your brand’s identity. Using the user-friendly Customizer in WordPress, you can easily personalize various aspects of your website, such as colors, fonts, layouts, menus, widgets and more.
Just head over to the “Appearance” section and click on “Customize” to start making changes. The best part is that you can preview the alterations before saving them, ensuring everything looks just the way you want it to be.
Take some time to experiment with different settings until you achieve the perfect look and feel that aligns with your vision.
After achieving an appealing website design, the next step is to incorporate content. WordPress has two main content types: posts and pages. Posts are for regularly updating content like blog entries, while pages are for static information like your about page, contact page, or services.
You should have these essential pages at a minimum:
a) Home: This is the main page of your website, where visitors first land when they type in your domain name.
b) About: Here, you can tell visitors about yourself, your business, or the purpose of your website.
c) Contact: Provide contact information so visitors can get in touch with you.
d) Blog: If you plan to write regular articles or updates, set up a blog page.
e) Privacy Policy: This document explains to users how the website’s owner collects, uses, and protects their personal information.
f) Terms & Conditions: It’s a legal document that outlines the rules, obligations, and limitations for using the website by its visitors and users.
g) Disclaimers: This statement clarifies the limitations of liability and the information provided on the website, protecting the website owner from certain legal claims.
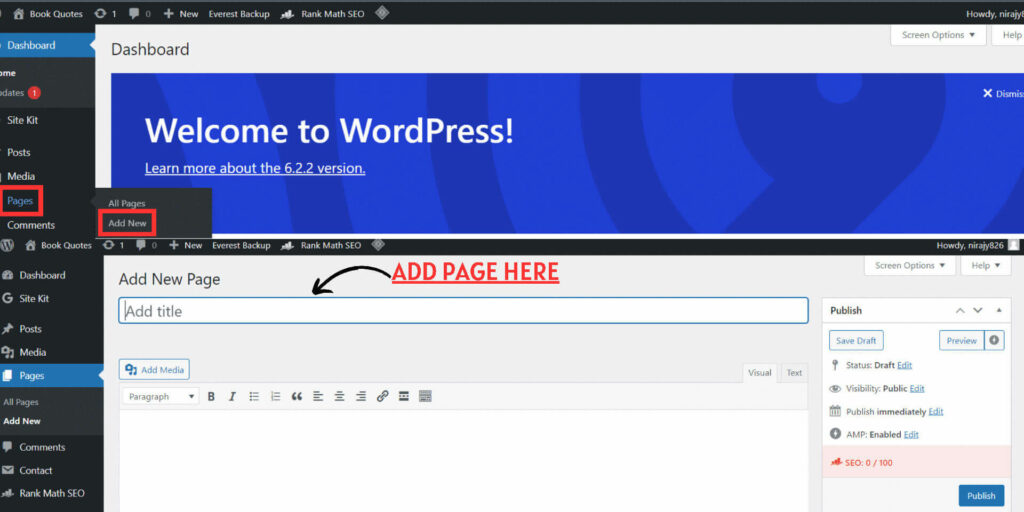
Note: To create pages, click on “Pages” in the WordPress dashboard and click “Add New.” Give your page a title, add content, and hit “Publish” when you’re ready to make it live.
Step 7: Installing Plugins.
Plugins are similar to apps that enhance your website’s functionality. WordPress offers numerous free and premium plugins, including some key ones:
a) Yoast or RankMath SEO: It helps to optimize your website for search engines.
b) Akismet Anti-Spam: It protects your site from spam comments.
c) Contact Form 7: It enables easy creation of contact forms.
d) Everest Backup: It enhances security and performance with various tools.
e) Elementor: Enables easy & intuitive drag-and-drop page building for visuallystunning websites without coding.
f) Google SiteKit: It integrates Google tools like Analytics, Search Console, AdSense, and PageSpeed Insights into one dashboard for valuable insights to optimize and monitor website performance.
To install plugins, go to “Plugins” in the WordPress dashboard, click “Add New,” search for the desired plugin you want, and click “Install” and then “Activate.”
To discover further information about the most affordable WordPress plugins, please read this Blog Post.
Step 8: Optimizing Your Website for Search Engines.
To make sure more people can find your website, it’s essential to improve its visibility on search engines. You can do this by using SEO plugins like Yoast SEO, RankMath SEO, or All in One SEO Pack to help optimize your content.
Focus on using relevant keywords, writing meta descriptions, and creating helpful and valuable content for your visitors. Also, ensure your website is responsive, loads fast, and has a well-organized site structure for better search engine rankings.
Don’t forget to manage the settings menu options such as General Setting, Writing, Reading, Discussions, Media, and Permalinks.
Step 9: Setting Up Menus.
Menus simplify navigation for your website visitors. To create a menu, follow these steps:
- Go to the “Appearance” option in the WordPress dashboard.
- Click on “Menus” and then select “Create a new menu.”
- Add the pages and categories you desire in your menu.
- Finally, save your menu to make it functional on your website.
With a well-organized menu, visitors can easily find and access different pages and categories, enhancing their overall browsing experience.
Step 10: Creating and Publishing Content.
In pursuing website success, the pivotal role of compelling content remains unrivaled. Crafting compelling blog posts is a key strategy to attract and engage your audience.
To create a new blog post:
- Start by accessing the WordPress dashboard and navigating to the “Posts” section.
- There, click on “Add New” to begin drafting your masterpiece.
- Give your post an attention-grabbing title and pour your creativity into crafting valuable content.
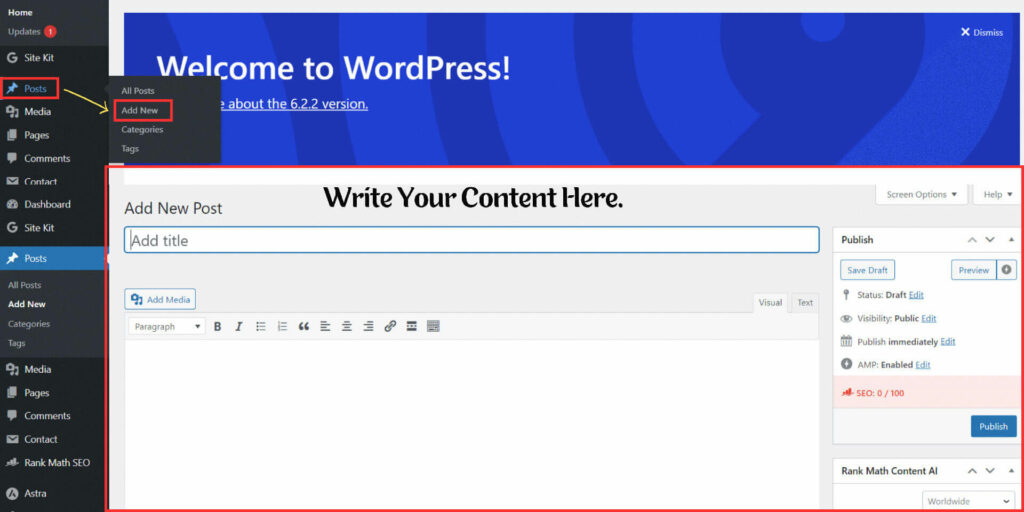
Once you are satisfied with your creation, simply hit the “Publish” button, and your blog post will be live for the world to see.
Remember, quality content is the foundation of a thriving online presence, so make sure to invest time and effort in delivering informative and captivating articles to your readers.
Conclusion:
Congratulations! You’ve successfully created a website using WordPress. Creating a website using WordPress is no longer a complex task, even for a 15-year-old.
By following the steps outlined in this guide, you can have your website up and running in no time. Remember, building a website is an ongoing process, so keep adding new content, updating your design, and exploring new plugins to enhance your website’s functionality. With WordPress’s user-friendly interface and our step-by-step guide, you can continue to grow and improve your website for years to come. Happy website building!