In The World of WordPress, HTML looks tricky. Fortunately, for many non-techy web owners, WordPress seemingly dovetails the gap through its user-friendly interface.
Yet, understanding how to edit HTML as a WP admin could make a whole world of difference in enhancing the Appearance and functionality of your website.
In this comprehensive guide, we will walk you through the intricacies of editing HTML in WordPress, ensuring that your website stands out and ranks higher on Google.
A brief explanation of HTML and its role in WordPress:
In rudimentary terms, HTML (Hyper Text Markup Language) is the basic building block that aids web browsers in interpreting and displaying content as web pages. How, then, does HTML come into play in WordPress? Most WordPress sites are composed of HTML alongside CSS (Cascading Style Sheets) and PHP.
One area you directly encounter HTML while using WordPress is while adding or editing the content of a post or a page. To offer more customizability to users, WordPress provides an option to switch to a Text editor from a Visual editor. This Text editor displays HTML, and manipulating it could afford more control over how your content looks and acts.
Why Edit HTML in WordPress?
Before we dive into the nitty-gritty of HTML editing, let’s establish why you might need to do it in the first place. WordPress is renowned for its user-friendly interface and the vast array of plugins and themes available. However, there are situations where you might want to take more control:
1. Customization Beyond Themes:
While WordPress themes provide a great starting point for your website’s design, you may have a unique vision that requires customizations beyond what a theme offers. Editing HTML allows you to fine-tune every aspect of your site’s Appearance and functionality.
- Troubleshooting Issues:
Sometimes, website issues may arise due to conflicting plugins or theme updates. Editing HTML can help you diagnose and fix these issues swiftly, ensuring a smooth user experience.
- SEO Optimization:
Search Engine Optimization (SEO) is paramount for online visibility. HTML editing allows you to optimize your site structure, meta tags, and other crucial elements that boost your ranking on Google and other search engines.
Now that we’ve established the importance of HTML editing, let’s get into the details.
2. Preparing to Edit HTML:
- Backup Your Website: Before making any changes, you must back up your WordPress website. This precaution ensures that you can restore your site to its previous state if something goes wrong while editing HTML. Some plugins, like UpdraftPlus, can make this easier.
- Choose the Right HTML Editor: Selecting the right HTML editor is crucial for a smooth editing experience. While WordPress provides a built-in editor, many website owners prefer using external text editors like Visual Studio Code or Sublime Text for their advanced features and ease of use.
3. Accessing and Editing HTML in WordPress:
Here’s a step-by-step guide to accessing and editing HTML in WordPress:
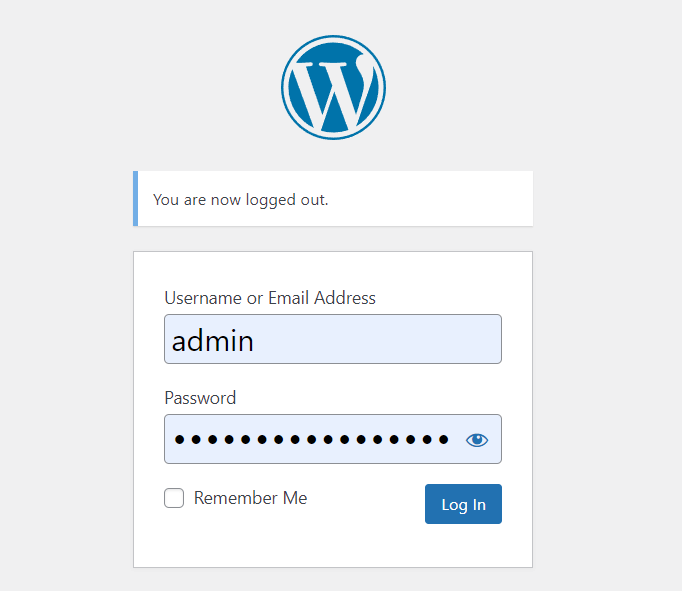
- Log in to Your WordPress Dashboard: Begin by logging in to your WordPress dashboard using your admin credentials.
- Navigate to the Editor: Once logged in, go to the “Appearance” section on the left-hand menu and select “Theme Editor.”
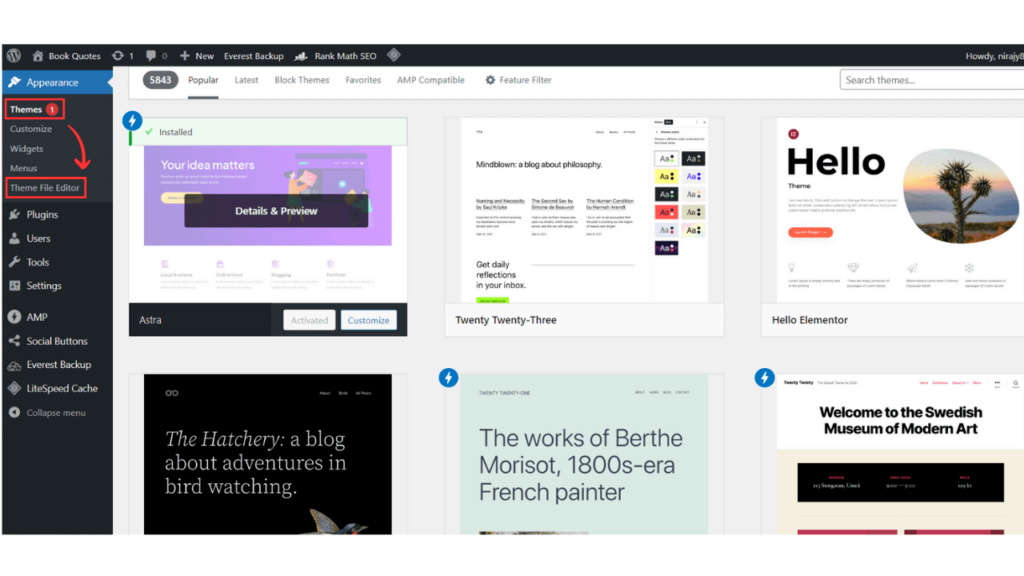
- Choose the File to Edit: In the Theme Editor, you’ll see a list of template files on the right-hand side. Select the file you want to edit. If you’re unsure which file to choose, it’s a good practice to consult your theme’s documentation.
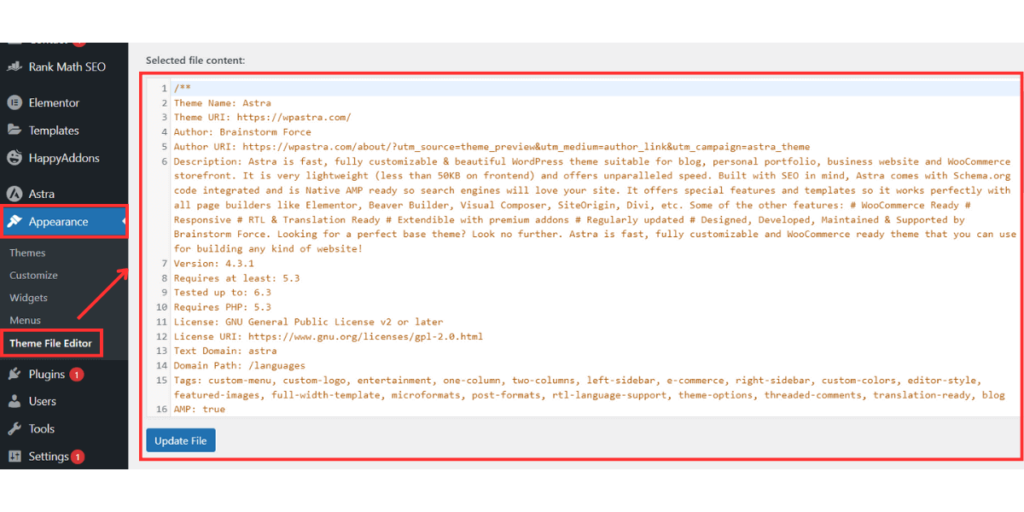
- Make Your Edits: Now, you can make your HTML edits directly in the code editor. Ensure that you have a clear understanding of HTML markup, as incorrect changes can affect your website’s functionality.
- Save Your Changes: After making the necessary edits, click the “Update File” button to save your changes. Always double-check your edits before saving to avoid errors.
In addition, WordPress allows you to change the HTML directly in theme files via Appearance> Editor. However, this can greatly affect the layout of your pages and is generally not recommended unless you’re proficient in HTML and PHP.
To learn how to edit the .htaccess file, please refer to this article. For more informative articles, visit our blog section.
4. Editing HTML in Block Editor (Gutenberg):
With the innovation of the WordPress Gutenberg editor, users can now enjoy a modern and stylish method of generating great content. But sometimes, the need to tweak the HTML code in WordPress may arise to create more customized content. Let’s take you through a step-by-step guide on how to edit HTML in the Gutenberg editor.
A step-by-step guide on editing HTML in the Gutenberg editor.
In the Gutenberg editor, one can add or edit HTML code using two methods. The first one involves adding a custom HTML code to content blocks, while the other one entails editing the entire source code of a post.
Adding custom HTML code to content blocks:
- Begin by adding a new block in WordPress.
- Choose the “Custom HTML” block type.
- Input the desired HTML code directly into the content block.
- After inserting the HTML code, save the changes by clicking the “Update” or “Publish” button.
This method is useful for adding simple embed codes, custom forms, or other types of code snippets to your WordPress post or page.
Editing the entire source code of a post:
Sometimes, a user might need to make larger changes to the HTML code. In such cases, editing the whole source code of a post becomes inevitable.
- To make substantial HTML code changes, open the post that needs editing.
- Click the “Three-dot menu” at the top right corner of the editor.
- Choose “Code Editor” to access the entire page’s source code.
- After making the required edits, save changes by clicking the “Update” button.
Remember this method necessitates a strong understanding of HTML to prevent potential errors that could affect your website’s layout and functionality.
5. Editing HTML in Classic Editor (TinyMCE):
To edit HTML in the Classic editor (TinyMCE), follow these steps:
- Open your desired post or page in the Classic editor.
- Click on the “Text” tab located in the upper right corner.
- The text area will transform into an HTML editor, allowing you to add or modify HTML content.
- After making your changes, save them by clicking on the “Update” option on the right-hand side.
This straightforward process enables you to edit HTML for individual posts or pages using WordPress’s Classic editor, TinyMCE.
6. Best Practices for HTML Editing:
To ensure that your HTML editing efforts yield the best results and improve your website’s Google ranking, consider these best practices:
- Mobile Responsiveness: To make sure your website looks great and works well on any device, use responsive design principles. Google gives higher importance to mobile-friendly websites when ranking them in search results.
- Clean Code: Write clean and well-structured HTML code. Avoid unnecessary tags and elements, as this can improve your website’s loading speed and overall user experience, two factors Google values highly.
- SEO-Friendly Elements: Optimize your HTML elements for SEO. This includes using descriptive alt tags for images, writing concise and keyword-rich meta titles and descriptions, and structuring your content with appropriate header tags (H1, H2, H3, etc.)
Conclusion:
Editing HTML in WordPress opens up a world of possibilities for customization and optimization, enabling you to create a website that stands out and ranks higher on Google. By following the best practices outlined in this guide and approaching HTML editing with care, you can take full control of your website’s design and functionality.
Remember that while HTML editing is a powerful tool, it should be used judiciously. Always back up your site; if you’re uncertain about making changes, consult a professional web developer. With the right approach and attention to detail, you can enhance your website’s performance and propel it to the top of Google’s search results.